
The step-by-step guide “How to configure a wireless router?” provides instructions on setting up a wireless router to establish a reliable internet connection without the need for physical cables. Following this guide will help you configure your router and enjoy a seamless wireless network.
Top-selling wireless devices and accessories


Guide on Setting Up a Wireless Router
Gather the necessary equipment
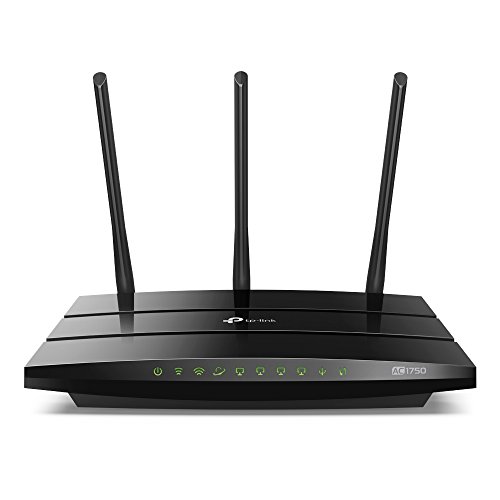
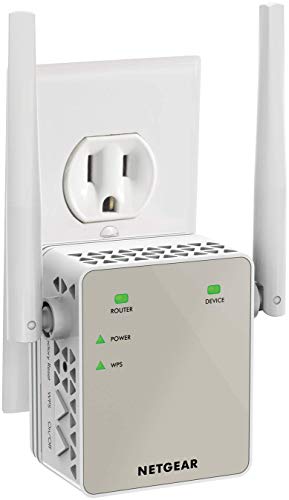
Before embarking on the configuration process, it is crucial to gather all the necessary equipment to ensure a smooth setup. Firstly, you will need a wireless router, which acts as the central hub for your network. This is responsible for transmitting the internet signal wirelessly to your devices. Some popular models include the TP-Link Archer C7 and the Netgear Nighthawk AC1750.
Secondly, an Ethernet cable is essential for connecting your router to your modem or directly to your computer. This cable allows for a stable and fast internet connection, especially if you have multiple devices connected to your network. Make sure you have a reliable Ethernet cable, such as the Cat 6 or Cat 7, to ensure optimal performance.
Next, you will need a computer or mobile device to access the router’s configuration interface. This will allow you to make any necessary changes or adjustments to your network settings. Examples of suitable devices include a laptop, desktop computer, smartphone, or tablet.
Lastly, don’t forget the necessary power adapters for your router and any other devices involved in the setup. Ensure that you have the correct adapters for your specific equipment to avoid any compatibility issues. It is always a good idea to double-check the power requirements and voltage specifications mentioned in the user manual or on the device itself.
By gathering these essential pieces of equipment, you will be well-prepared to embark on the configuration process and create a stable and secure network for your home or office.

Connect the router to the modem
Connect the router to the modem by following these simple steps:
- Locate the Ethernet cable that came with your router. It typically has yellow ends and is larger than a telephone cable.
- Position your wireless router close to your modem, ensuring they are within reach of each other.
- Take one end of the Ethernet cable and insert it into the WAN (Wide Area Network) port on the back of your router. This port is usually labeled with “WAN” or “Internet.”
- Next, locate the LAN (Local Area Network) port on the back of your modem. It is usually labeled with “LAN” or “Ethernet.”
- Insert the other end of the Ethernet cable into the LAN port of your modem.
- Double-check that the cable is securely connected to both the router and modem to establish a stable connection.
Now that the router and modem are connected, you can proceed with configuring your wireless network settings. This will enable you to connect devices to the internet through your router. Refer to the user manual or manufacturer’s instructions for further guidance on setting up your wireless network.
Access the router's settings
To access the router’s settings, open a web browser on your computer or mobile device. Type the default IP address of your router into the address bar. You can usually find this IP address in the router’s manual or on the manufacturer’s website. After entering the IP address, a login page will appear, prompting you to enter the router’s username and password.
Change the default login credentials
Why Change the Default Login Credentials?
For security purposes, it is highly recommended to change the default login credentials of your router. The default username and password provided by the manufacturer are often well-known and easily accessible, making your network vulnerable to unauthorized access. By changing the default login credentials, you can significantly enhance the security of your router and protect your network from potential threats.
How to Change the Default Login Credentials
- Access your router’s settings by opening a web browser and typing in the default IP address of your router. This address can usually be found on the back or bottom of the router, or in the user manual.
- Enter the default username and password when prompted. If you don’t know these credentials, try searching online for the default login information specific to your router model or consult the user manual.
- Once logged in, navigate to the “Administration” or “Settings” section of the router’s interface.
- Look for an option related to changing the login credentials. It may be labeled as “Change Password,” “User Management,” or something similar.
- Click on the option and you will be prompted to enter the new username and password.
- Choose a strong username and password combination that is unique and not easily guessable. Use a mix of uppercase and lowercase letters, numbers, and special characters.
- After entering the new login credentials, click on “Save” or “Apply” to confirm the changes.
- Finally, log out of the router’s interface and log back in using the new username and password to ensure that the changes have been successfully applied.
Remember to keep your new login credentials in a safe place and avoid sharing them with unauthorized individuals. Regularly changing your router’s default login credentials is a simple yet effective step towards protecting your network from potential security risks.
Configure the wireless network settings
To configure the wireless network settings, first, access the router’s settings by entering the router’s IP address in a web browser. Once you are logged in to the router’s interface, navigate to the wireless network settings section. This can usually be found under the “Wireless” or “Network” tab.
In this section, you will find options to customize the network name, also known as the SSID (Service Set Identifier). It is recommended to choose a unique and easily identifiable name for your network. This name will be visible to users when they search for available wireless networks.
Next, it is essential to set a password to secure your wireless network. Look for the option to set the network password or passphrase. Click on it and enter a strong and unique password. A strong password typically consists of a combination of uppercase and lowercase letters, numbers, and special characters. Avoid using common words or easily guessable information such as your name or birthdate.
After entering the password, save the changes and exit the settings. Your wireless network is now configured with a custom name and a secure password, which will help prevent unauthorized access to your network.
Set up additional features
To configure additional features on your wireless router, such as parental controls, guest networks, or port forwarding, follow these steps:
- Access the router’s settings by opening a web browser and entering the IP address of your router in the address bar. The IP address is typically mentioned in the router’s manual or can be found on the bottom of the router itself.
- Once you have accessed the router’s settings, you may need to enter a username and password. If you have not changed these credentials, the default username and password can usually be found in the router’s manual.
- Look for a section or tab labeled “Advanced Settings” or “Additional Features” in the router’s settings menu. Click on it to explore the available options.
- To set up parental controls, locate the parental control settings. Enable this feature and specify the devices or websites you want to restrict access to. You may also have the option to set specific time limits for internet usage.
- To create a guest network, find the guest network settings. Enable this feature and set a name and password for the network. You may also have the option to restrict access to certain devices or limit the bandwidth available to guest users.
- If you need to set up port forwarding, navigate to the port forwarding settings. Specify the port or range of ports you want to forward, as well as the IP address of the device you want to forward the ports to. This is useful if you need to access certain services or applications from outside your network.
Remember that the configuration process may vary depending on the make and model of your router, so consult the router’s manual or online documentation for specific instructions.
Test the connection
To test the wireless connection after completing the configuration process, follow these steps:
- Disconnect any devices that are currently connected to the router via Ethernet cables.
- Connect these devices to the wireless network. This usually involves accessing the Wi-Fi settings on the device and selecting the appropriate network name (SSID).
- Once connected, open a web browser on each device and try accessing a website to check if you can access the internet.
- Make sure to browse different websites and load various pages to ensure that the connection is stable.
- If you encounter any issues, such as slow or intermittent internet, try restarting the router and repeating the test.
- Additionally, you can try connecting other devices, such as smartphones or tablets, to the wireless network to verify that the connection is working well across multiple devices.
By following these steps, you can ensure that your wireless connection is functional and stable, allowing you to enjoy uninterrupted internet access.
Final Thoughts
Conclusion:
To sum up, configuring a wireless router is a simple task that can be accomplished by carefully following the provided step-by-step guidelines. By ensuring the proper setup of your wireless router, you will be able to enjoy a secure and dependable internet connection across all your devices.
Optimize Your Setup
Step-by-step guide on utilizing wireless technology for seamless connectivity
- Familiarize yourself with the basics: Start by understanding what wireless technology is and how it works. Research the different types of wireless communication, such as Wi-Fi, Bluetooth, and cellular networks, to gain a foundational understanding
- Set up your wireless devices: Begin by ensuring that your devices have built-in wireless capabilities or are compatible with wireless adapters. Follow the manufacturer’s instructions to set up and configure your devices for wireless connectivity
- Connect to a wireless network: Locate and connect to an available wireless network in your area. This may be a public Wi-Fi network or a private network provided by your Internet service provider. Follow the network’s instructions to connect securely and enter any required passwords or access codes
- Understand wireless security: Learn about wireless security protocols, such as WPA2 (Wi-Fi Protected Access 2), and implement them to safeguard your network and devices against unauthorized access. Set strong and unique passwords for your Wi-Fi network and make sure to regularly update the firmware on your devices
- Explore wireless applications: Once you have a wireless connection, explore the various applications and services that utilize wireless technology. This could include streaming media, online gaming, video calls, and smart home automation. Familiarize yourself with the features and settings of these applications to enhance your wireless experience
- Remember, wireless technology is constantly evolving, so it’s essential to stay updated with the latest developments and best practices to make the most of it
I would suggest including some tips for improving wireless signal strength and coverage in the guide.
Can you recommend a specific wireless router model that is reliable and easy to configure?
It would be helpful if you could cover how to set up a guest network on the wireless router in a future article.