
The step-by-step guide “How to Install a Smart Water Leak Detector in Easy Steps” offers simple instructions to help you install a smart water leak detector. This guide aims to assist you in safeguarding your home against water damage by installing a dependable and effective smart device.
Top-rated water leak detectors for your home

Guide to Installing a Smart Valve in Your Home
Gather the necessary tools and materials
Before beginning the installation process, it is imperative to gather all the necessary tools and materials. To ensure a smooth and efficient setup, please follow these steps:
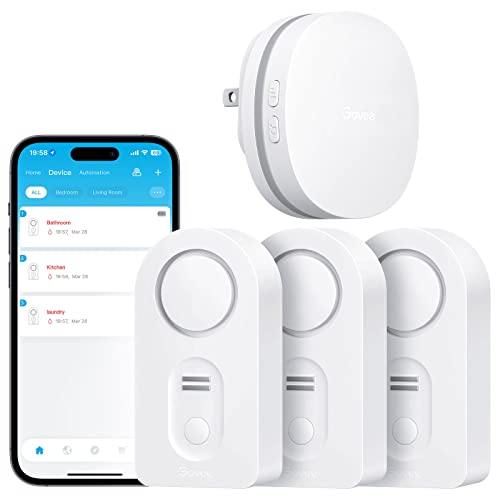
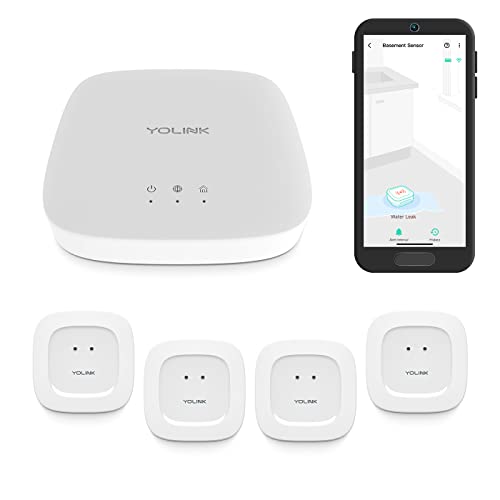
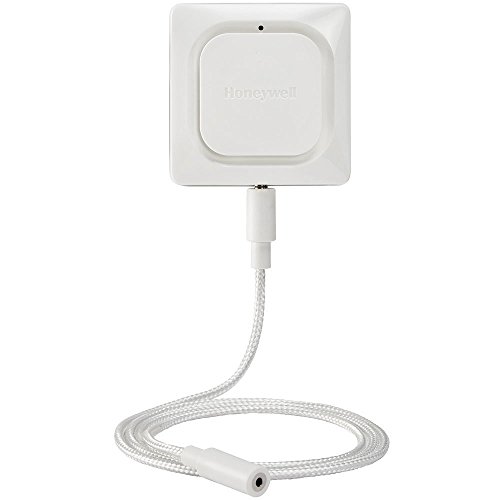
- Obtain a smart water leak detector kit: This kit typically includes the necessary components such as sensors, a hub, and cables. It is essential to have this kit on hand before starting the installation.
- Prepare a smartphone or tablet: To monitor and control the smart water leak detector system, you will need a compatible smartphone or tablet. Ensure it is fully charged and ready to use during the setup process.
- Gather batteries: Check the manufacturer’s instructions to determine if batteries are required for any of the components in the kit. If so, make sure you have the correct type and quantity of batteries readily available.
- Grab a screwdriver: Depending on the specific model and design of the smart water leak detector, you may need a screwdriver to install and secure certain components. Ensure you have the appropriate screwdriver size and type for the job.
- Additional items specified by the manufacturer: Carefully review any additional tools or materials mentioned in the manufacturer’s guide. These could include cable ties, mounting brackets, or other specialized items to assist with the installation. Have these items ready as per the manufacturer’s instructions.
By following these steps and having all the necessary tools and materials readily available, you can ensure a successful installation of your smart water leak detector system.

Choose the ideal location
Carefully select the location for installing the smart water leak detector. Choose an area near potential water sources, such as sinks, toilets, and water heaters. Ensure easy accessibility and effective monitoring of the surrounding area for leaks. Place the detector in a suitable position, considering factors such as visibility and proximity to the water source. Make sure it is within range of your Wi-Fi network for proper connectivity. Test the detector’s functionality after installation to ensure accurate detection and timely alerts. Regularly check and maintain the detector to ensure its optimal performance in detecting water leaks.
Prepare the installation site
Clean the installation site thoroughly by removing any dust, debris, or moisture that may hinder the smart water leak detector’s performance. Start by using a dry cloth to wipe the area, ensuring that all surfaces are free from any particles. Next, inspect the site for any signs of moisture or dampness, and if found, use a suitable cleaning agent to remove it. For instance, if there is a spill or dampness on the floor, use a mop or absorbent cloth to soak up the moisture.
Additionally, if there are any visible dust or debris on the walls or surrounding surfaces, use a soft brush or a vacuum cleaner to gently remove them. Pay close attention to corners and crevices, as these areas are often prone to accumulating dust and debris. It is essential to create a clean and dry environment to ensure optimal performance and accuracy of the smart water leak detector.
Install the batteries
To install the batteries in your smart water leak detector, follow these steps:
- Open the battery compartment: Locate the battery compartment on the smart water leak detector. This is usually on the bottom or back of the device. Use your fingers or a small tool to open the compartment.
- Check the manufacturer’s instructions: Review the manufacturer’s instructions to determine the type and number of batteries required for your smart water leak detector. Ensure that you have the correct batteries on hand before proceeding.
- Insert the batteries: Insert the batteries into the battery compartment, following the polarity markings indicated inside the compartment. Most batteries have clear markings to show which end should be facing up or down. Double-check the correct orientation before inserting them.
- Secure the batteries: Ensure that the batteries are inserted securely, making good contact with the metal terminals in the battery compartment. Gently press down on each battery to confirm that it is properly seated.
- Close the battery compartment: Once the batteries are in place and securely inserted, close the battery compartment. Make sure it is fully closed and latched to prevent any accidental disconnection of the batteries.
Example:
For instance, if the battery compartment has a sliding cover, slide it back into place until you hear a click. If it has a screw-on cover, twist it clockwise until it is tightly closed.
By following these simple steps, you can successfully install the batteries in your smart water leak detector and ensure that it is powered up and ready to detect any potential leaks.
Connect the detector to your smartphone or tablet
Download and install the corresponding mobile application for your smart water leak detector. Simply visit your device’s app store, search for the app name, and tap on the “Install” button. Once the installation is complete, open the app and follow the on-screen instructions to proceed.
Connect the detector to your smartphone or tablet via Bluetooth or Wi-Fi. To do this, ensure that your device’s Bluetooth or Wi-Fi is turned on. On the app’s main screen, tap on the “Connect” button or the icon that represents the connection process. Wait for the app to search for available devices.
When the app displays a list of available devices, select your water leak detector from the list. If prompted, enter the necessary information such as the detector’s serial number or any other required details. If required, create an account by providing your email address and creating a password.
After entering the necessary information, tap on the “Connect” or “Pair” button. Wait for the app to establish a connection with the detector. Once the connection is successful, you will see a confirmation message on your device’s screen.
That’s it! You have successfully connected your smart water leak detector to your smartphone or tablet. Now you can access and control the detector’s features and receive real-time alerts directly on your mobile device.
Place the detector in the desired location
Position the smart water leak detector in the previously selected location. First, gather the screws or adhesive provided in the kit. Then, choose a suitable surface such as a wall, floor, or any other flat area. Use the screws to attach the detector securely to the surface, making sure it is level and properly aligned for accurate detection. If using adhesive, carefully apply it to the back of the detector and firmly press it against the chosen surface. Ensure that the adhesive has enough time to set and bond properly. By following these steps, you can confidently place the detector in your desired location and ensure its effective functionality.
Test the detector and adjust settings
To test the functionality of the smart water leak detector after installation, simulate a water leak to trigger the detector. Start by placing a small amount of water near the detector or use a damp cloth to create a wet surface. Wait for a few seconds to allow the detector to register the presence of water. Once the detector has detected the water, check if it sends an alert to your connected device, such as a smartphone or tablet. Ensure that you have a stable internet connection and that your device is within the range of the detector.
After receiving the alert, carefully examine the notification and assess its accuracy and timeliness. If necessary, adjust the sensitivity levels of the detector to ensure optimal performance. You may need to refer to the user manual or consult the manufacturer’s website for specific instructions on adjusting sensitivity levels. Additionally, customize your notification preferences according to your needs. This could include choosing the type of alert (sound, vibration, or both) and selecting the method of notification (push notification, email, or SMS).
By testing the detector and making any necessary adjustments to the settings, you can ensure that it effectively detects water leaks and promptly notifies you, helping to prevent potential water damage and mitigate any associated risks.
Key Takeaways
In conclusion, the installation of a smart water leak detector is a simple and effective way to protect your home from potential water damage. By following the easy steps outlined in this blog post, you can confidently install this device and enjoy the peace of mind that comes with knowing you are taking proactive measures to safeguard your property. Don’t wait until it’s too late – take action today and protect your home from the costly and disruptive effects of water leaks.


I recently installed a smart water leak detector in my home and it has been a game changer! Just last week, it alerted me to a small leak under my sink before it turned into a major problem. I was able to fix it right away and prevent any damage. Highly recommend installing one!
I’m not sure if a smart water leak detector is necessary for everyone. I live in an apartment and the chances of a major water leak are pretty low. However, I can see how it would be useful for homeowners or people with basements. Interested to hear other perspectives!
One tip I have is to choose a smart water leak detector that is compatible with your existing smart home system. This way, you can easily integrate it with your other devices and control everything from one app. It makes the whole setup much more convenient!
That’s a great tip! Compatibility with your existing smart home system is definitely something to consider when choosing a smart water leak detector. It can make the installation and operation much smoother. Thanks for sharing!
I followed the guide step by step, but I’m having trouble connecting the detector to my smartphone. I’ve tried restarting both devices and re-installing the app, but it’s still not working. Any troubleshooting tips would be greatly appreciated!
I installed a smart water leak detector in my basement and it saved me from a potential disaster. I had no idea that my washing machine had a leak, but the detector alerted me immediately. I was able to shut off the water and get it fixed before any damage occurred. So glad I invested in one!
Wow, that’s an amazing real-world application of a smart water leak detector! It’s stories like yours that highlight the importance of having one installed. Thanks for sharing your experience!