In this step-by-step guide, I will walk you through the process of managing multiple cameras on a home surveillance system. We will start by discussing the importance of planning and determining the number of cameras needed for your specific needs. Then, we will explore the different types of cameras available and how to choose the right ones for your setup.
Next, we will dive into the installation process, covering everything from mounting the cameras to connecting them to a central monitoring system. I will provide detailed instructions on how to run cables, set up power sources, and configure the cameras for optimal performance.
Once the cameras are installed, we will move on to the configuration stage, where I will guide you through setting up each camera’s settings, such as resolution, frame rate, and motion detection. I will also explain how to assign unique names and addresses to each camera for easy identification and management.
Furthermore, I will discuss the importance of network security and provide steps to secure your home surveillance system from potential threats. This includes password protection, enabling encryption, and setting up remote access securely.
Lastly, I will cover the monitoring and management aspect of your home surveillance system. I will explain how to access the live feeds from your cameras, review recorded footage, and set up alerts for motion or other events. Additionally, I will provide tips on how to effectively manage and maintain your surveillance system, including regular software updates and camera maintenance.
By following this step-by-step guide, you will be equipped with the knowledge and skills to successfully manage multiple cameras on your home surveillance system, ensuring the safety and security of your property.
Top Selling Home Surveillance Systems

Assess Your Surveillance Needs
Assessing your surveillance needs is an essential step before setting up multiple cameras. To begin, carefully consider the size of the area you wish to monitor. Measure the dimensions of the space and identify any specific areas of concern that require surveillance. This will help you determine how many cameras you will need, as well as their placement.
Next, think about the desired camera angles. Determine the optimal viewpoints that will provide comprehensive coverage of the area. Consider any potential blind spots or areas that may require additional cameras for better visibility.
Additionally, take into account any environmental factors that could affect camera performance, such as lighting conditions or potential obstructions. Ensure that the cameras you choose are suitable for the specific conditions of the area you are monitoring.
By conducting a thorough assessment of your surveillance needs, you will be able to determine the number of cameras required and their optimal placement. This will ensure that you achieve the desired coverage and effectively monitor your target area.


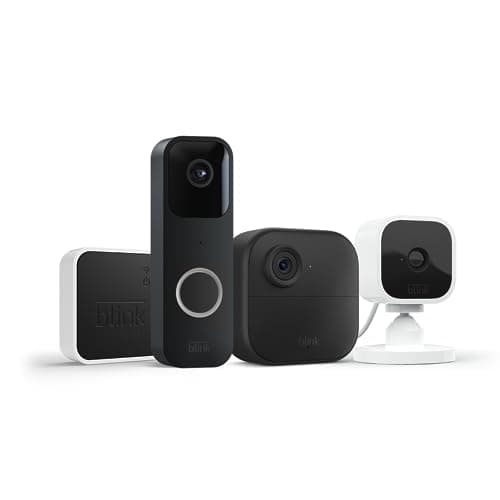
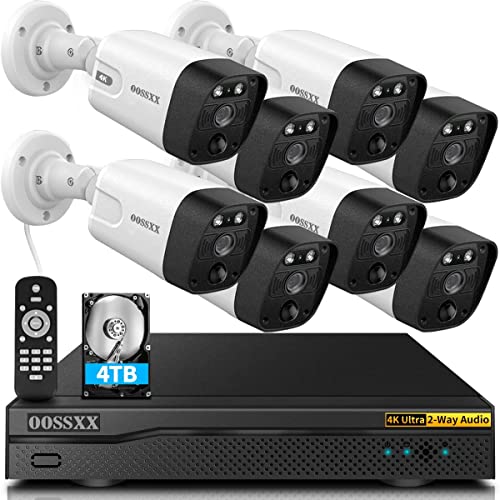
Choose the Right Cameras
Selecting the appropriate cameras for your home surveillance system is essential. Consider the following factors to make an informed decision:
- Resolution: Determine the level of detail you require from your cameras. Higher resolution cameras provide clearer images, allowing for better identification of individuals or objects.
- Night Vision: If you need surveillance during nighttime or low-light conditions, ensure that the cameras you choose have excellent night vision capabilities. Look for a high infrared (IR) range and infrared cut filters to capture clear footage even in the dark.
- Weather Resistance: If you plan to install outdoor cameras, it is crucial to select models that are weather-resistant. Look for cameras with an IP (Ingress Protection) rating, indicating their ability to withstand various weather conditions.
- Connectivity Options: Decide whether you prefer wired or wireless cameras. Wired cameras offer a reliable and consistent connection but may require professional installation. Wireless cameras provide flexibility in terms of placement but may be susceptible to signal interference.
- Compatibility: Ensure that the cameras you choose are compatible with your chosen surveillance system. Check if they use the same communication protocol or if any additional hardware or software is required for integration.
By considering these factors, you can make an informed decision when selecting the right cameras for your home surveillance system.
Plan Camera Placement
To ensure the effectiveness of your surveillance system, careful planning of camera placement is crucial. Follow these steps to identify key areas to monitor and determine the best angles for capturing important details:
- Survey the area: Begin by thoroughly surveying the area you wish to monitor. Take note of the entry and exit points, high-risk areas, and any potential blind spots.
- Identify key areas: Determine the key areas that require monitoring. These may include entrances, parking lots, storage rooms, or sensitive equipment areas. Prioritize areas based on their importance and level of risk.
- Consider obstructions: Take into account any potential obstructions that may obstruct the camera’s view. These can include walls, trees, or other structures. Ensure that camera placement allows for an unobstructed view of the desired area.
- Assess lighting conditions: Evaluate the lighting conditions in each area. Consider factors such as direct sunlight, shadows, or low-light environments. Adjust camera placement to optimize visibility in different lighting conditions.
- Determine camera range: Understand the range of each camera you will be using. Consider the distance and angle at which important details can be captured. Adjust camera placement to ensure maximum coverage within the camera’s range.
- Minimize blind spots: Aim to minimize blind spots by strategically placing cameras to provide overlapping coverage. Ensure that there are no areas left unmonitored or vulnerable to unauthorized access.
By carefully planning the placement of your surveillance cameras, you can maximize coverage and optimize the effectiveness of your surveillance system. Regularly review and adjust camera positions as needed to adapt to changing security requirements.
Install the Cameras
To install the cameras, start by carefully following the manufacturer’s instructions for mounting and positioning. Make sure you have planned the camera placement beforehand. Consider factors such as power source availability and cable routing. Test each camera after installation to ensure proper functioning.
Connect Cameras to a Central System
To manage multiple cameras effectively, connect them to a central surveillance system. Begin by determining whether you will use a dedicated NVR (Network Video Recorder) or a software-based solution. Consult the manufacturer’s instructions to establish the connection. Ensure that each camera is recognized and accessible from the central system.
- Choose the type of central system: Decide whether you will use a dedicated NVR or a software-based solution. Consider factors such as budget, scalability, and specific requirements.
- Follow the manufacturer’s instructions: Read the user manual or installation guide provided by the camera manufacturer. Each camera model may have different configuration steps, so it is crucial to follow the specific instructions.
- Connect the cameras: Physically connect the cameras to the central system using the appropriate cables. Depending on the system, you may need Ethernet cables, coaxial cables, or wireless connections.
- Configure camera settings: Access the camera’s settings interface using a web browser or dedicated software. Configure the network settings, such as IP address, subnet mask, and gateway, to ensure compatibility with the central system.
- Add cameras to the central system: Access the central surveillance system interface or software. Look for an option to add cameras or devices. Enter the necessary information, such as the camera’s IP address or device ID, to establish the connection.
- Verify camera recognition: After adding a camera, check if it is recognized by the central system. Ensure that you can access the camera’s live feed and perform basic functions, such as recording or taking snapshots.
- Repeat for each camera: Repeat the steps above for each camera you want to connect to the central system. Verify the connection and functionality of each camera individually.
By following these steps and consulting the manufacturer’s instructions, you can effectively connect multiple cameras to a central surveillance system.
Configure Monitoring and Recording Settings
To configure the monitoring and recording settings for your surveillance system, follow these steps:
- Set up motion detection: Access the system’s settings menu and locate the motion detection options. Enable motion detection for each camera by selecting the corresponding checkbox or toggle switch. Adjust the sensitivity level to ensure accurate detection while avoiding false alarms. If available, define specific areas within the camera’s field of view to monitor for motion.
- Adjust camera settings: Navigate to the camera settings menu and make adjustments according to your preferences. These settings may include image quality, resolution, brightness, contrast, and zoom. Experiment with different settings to achieve optimal video quality for your monitoring needs.
- Define recording schedules: Access the recording settings menu and specify the time frames during which you want the cameras to record. Choose from options such as continuous recording, scheduled recording, or motion-triggered recording. Assign different schedules to individual cameras if necessary. Ensure that you allocate sufficient storage space to accommodate the desired recording duration.
- Utilize additional features: If your surveillance system offers remote viewing capabilities, configure the necessary settings to access the cameras remotely. This may involve setting up a mobile app or accessing a web-based interface. Additionally, consider enabling notifications to receive alerts when motion is detected or when specific events occur.
By following these instructions, you can effectively configure the monitoring and recording settings of your surveillance system. Remember to refer to your system’s user manual for specific guidance on accessing and adjusting these settings.
Regular Maintenance and Monitoring
Regular maintenance and monitoring of your home surveillance system is crucial to ensure its ongoing effectiveness in safeguarding your property. Here are a few important tasks to perform:
- Check camera functionality: Periodically test each camera in your surveillance system to ensure they are working properly. Access the live feed from each camera and verify that the video is clear and the camera is capturing the intended area. If any issues are detected, consult the camera’s user manual for troubleshooting steps or contact technical support.
- Clean lenses if necessary: Over time, dust, dirt, or smudges may accumulate on the camera lenses, impacting video quality. To clean the lenses, use a soft, lint-free cloth and gently wipe the surface in a circular motion. Avoid using harsh chemicals or abrasive materials that could damage the lens. Regular cleaning will ensure optimal image clarity.
- Secure connections: Ensure all cables and connections between the cameras, DVR/NVR, and power sources are firmly secured. Loose or damaged connections can lead to signal loss or interruptions in the video feed. Regularly inspect the cables and reattach or replace any that appear loose or damaged.
- Update system software: Check for updates to your surveillance system’s software regularly. Manufacturers often release updates that include security patches or new features that can enhance the system’s performance and protect against vulnerabilities. Follow the manufacturer’s instructions to download and install the latest software updates.
- Review recorded footage: Take the time to review the recorded footage from your surveillance system on a regular basis. This allows you to identify any suspicious activities, assess camera angles and coverage, and make necessary adjustments to camera settings. Ensure that the time and date on the footage are accurate for proper documentation.
By following these maintenance and monitoring practices, you will be able to maintain the effectiveness of your home surveillance system and ensure that it continues to provide the necessary security for your property.
Key Takeaways
Conclusion:
To effectively manage multiple cameras on a home surveillance system, it is crucial to approach the task with careful planning, select the right cameras for your needs, and ensure proper installation. By following these steps and regularly maintaining your system, you can significantly enhance the security of your property and achieve peace of mind.
It’s crucial to regularly update the firmware of the cameras to ensure they have the latest security patches. Additionally, using strong and unique passwords for your camera system is important to prevent unauthorized access.
In addition to regular maintenance, it’s a good idea to periodically test the cameras to ensure they are functioning properly. This can be done by reviewing recorded footage or performing live monitoring.
Absolutely! Regular testing and monitoring of the cameras are essential to ensure their proper functioning. Thanks for sharing this valuable tip!
That’s a great variation! Wireless cameras can definitely make installation and camera placement much easier. Thanks for sharing your experience!
I followed this guide and successfully set up my home surveillance system. It has given me peace of mind knowing that my property is being monitored. Thank you for the clear and concise instructions!
You’re welcome! I’m glad to hear that the guide helped you set up your home surveillance system successfully. It’s always great to have that peace of mind. If you have any further questions or need advanced tips, feel free to ask!
I found that using wireless cameras instead of wired ones gave me more flexibility in camera placement. It eliminated the need for running cables and allowed me to easily move the cameras around if needed.
Could you provide some tips on how to choose the right cameras for a home surveillance system? Are there any specific features to look out for?
Absolutely! When choosing cameras, it’s important to consider factors such as resolution, field of view, night vision capabilities, weatherproofing (for outdoor cameras), and connectivity options. I can provide more detailed tips on camera selection if you’re interested!
I recently set up a home surveillance system and used a combination of indoor and outdoor cameras. The outdoor cameras were weatherproof and had night vision capabilities, while the indoor cameras were smaller and more discreet. This allowed me to cover all areas of my property.
That’s a smart choice! Using a combination of indoor and outdoor cameras ensures comprehensive coverage of your property. Thanks for sharing your real-world application!
Can you provide some advanced tips for managing multiple cameras on a home surveillance system? I’m looking for ways to optimize the system’s performance and storage usage.
Certainly! Some advanced tips include setting up motion detection and configuring the system to only record when motion is detected. This helps optimize storage usage. Another tip is to schedule regular backups of recorded footage to an external storage device. Let me know if you need more advanced tips!