![[Upgraded] Bluetooth 5.0 Remote Shutter for iPhone & Android Camera Wireless Remote Control Selfie Button for iPad iPod Tablet, HD Selfie Clicker for Photos & Videos (Black)](https://cozyandsmart.com/wp-content/uploads/2023/11/upgradedbluetooth50remoteshutterforiphoneandroidcamerawireless.jpg)
In this step-by-step guide, I will explain how to pair a wireless remote camera with a receiver. This process allows for seamless communication between the two devices. By following these instructions, you will be able to establish a connection and ensure proper functionality.
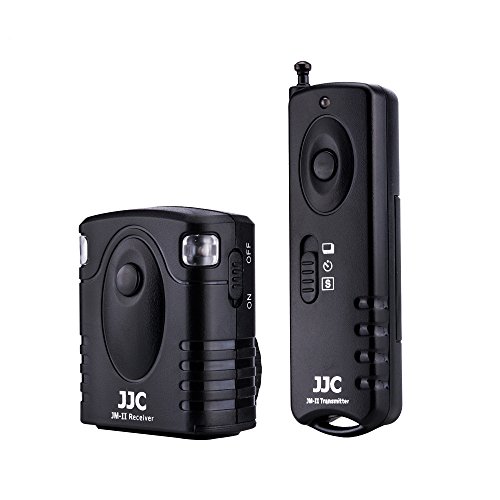
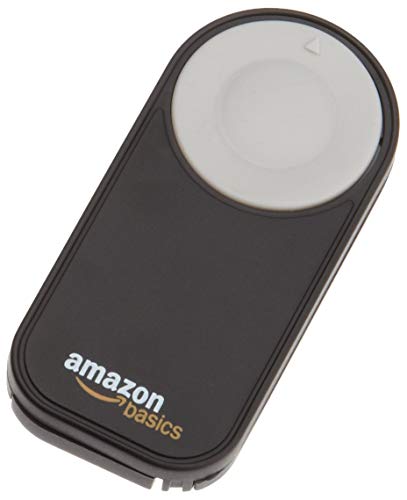
Top-selling wireless remote cameras
![[Upgraded] Bluetooth 5.0 Remote Shutter for iPhone & Android Camera Wireless Remote Control Selfie Button for iPad iPod Tablet, HD Selfie Clicker for Photos & Videos (Black)](https://m.media-amazon.com/images/I/41q1vdRtGmL.jpg)


Prepare the camera and receiver
To prepare the camera and receiver, first, ensure that both the wireless remote camera and the receiver are fully charged and powered on. This will ensure uninterrupted operation during the session. Next, position the camera and receiver within a reasonable range of each other to establish a stable connection. This will optimize the signal strength and prevent any signal dropouts or interference.


Access the camera's settings
To access the camera’s settings on a wireless remote camera, navigate to the settings menu. Look for a dedicated button or a touchscreen interface on the camera. Press the button or tap on the interface to open the settings menu. Once in the menu, search for the option to pair or connect the camera with a receiver.
Put the receiver in pairing mode
To put the receiver in pairing mode, access its settings or menu and locate the option to activate pairing mode. This mode enables the receiver to search for and establish connections with nearby cameras. Follow the instructions provided by the receiver to enter the pairing mode.
Initiate the pairing process
Select the “Search for Available Receivers” option on the camera. This will initiate a scanning process for nearby receivers in pairing mode. Allow the camera to detect the receiver and wait for the pairing to be established.
Select the receiver
Select the receiver:
- When the camera detects the receiver, it will present a list of available receivers. Choose the correct receiver from the list to establish the connection.
- Input the required passcode or PIN, if prompted, to complete the pairing process.
Confirm the pairing
To confirm the pairing between the camera and the receiver, follow these steps:
- Camera: On the camera’s screen, locate the pairing request prompt. It may appear as a pop-up message or in the settings menu.
- Receiver: Similarly, on the receiver’s screen, navigate to the pairing request message. This may also be displayed as a pop-up or in the settings menu.
- Camera: Tap on the “Confirm” or “Accept” button to initiate the pairing process.
- Receiver: On the receiver, select the “Confirm” or “Accept” option to establish the connection.
- Wait for both devices to display a confirmation message indicating that the pairing is successful.
For instance, on the camera, a prompt may appear saying “Allow connection to Receiver XYZ?” while on the receiver, a message might display “Camera ABC wants to connect. Accept?” Tap the corresponding buttons on both devices to confirm the pairing. Once both devices show a confirmation message, they are successfully paired and ready to use together.
Test the connection
To ensure a successful pairing, test the connection between the camera and the receiver. Take a test photo or video and verify its transmission to the receiver for any issues. Use the following steps to test the connection:
- Power on both the camera and the receiver.
- Position the camera and receiver within a reasonable range of each other.
- Adjust the camera settings to capture a test photo or video.
- Press the shutter button or start recording to capture the test media.
- Monitor the receiver for any interruptions or errors in the transmission.
- Check the received media on the receiver’s display to ensure it is clear and without any issues.
- Repeat the test if necessary, making adjustments to the camera or receiver settings as needed.
By following these steps, you can effectively test the connection between the camera and receiver to ensure seamless transmission of media.
Adjust settings if needed
If you encounter any issues or need to customize the camera or receiver settings, refer to the user manual or manufacturer’s instructions. Check the troubleshooting section for guidance on resolving common problems. Make necessary adjustments to optimize the wireless remote camera and receiver connection by accessing the settings menu on both devices.
Secure the connection
Enable available security features on both the camera and the receiver to protect the connection from unauthorized access. Utilize password protection, encryption, and disable any open network connections to ensure maximum security.
Key Takeaways
In conclusion, by carefully following the steps outlined in this blog post, you can confidently pair your wireless remote camera with a receiver. This process enables you to effortlessly transmit photos and videos wirelessly, providing you with a convenient and flexible way to capture and share moments. Enjoy the benefits of this technology and explore the endless possibilities it offers for your photography needs.
Necessary Equipment


Troubleshooting Steps
Instructions for Setting Up and Operating the Wireless Remote Camera
- Familiarize yourself with the camera: Before using the wireless remote, take the time to understand the different functions and features of your camera. Read the user manual or watch tutorial videos to ensure you have a good grasp of its capabilities
- Activate the camera’s wireless remote feature: Check if your camera has built-in wireless capabilities or if you need to purchase a separate remote control device. Activate the wireless remote feature according to the instructions provided by the camera manufacturer
- Pair the remote with your camera: If your camera and remote are separate devices, follow the instructions to pair them together. This typically involves establishing a wireless connection between the two by selecting the correct settings on both devices
- Understand the remote control functions: Learn about the various buttons and controls on the wireless remote. Typically, the remote will have options for shutter release, zoom, focus, and other camera settings. Familiarize yourself with how each function works and how to adjust them using the remote
- Practice using the remote: Once you have set up the remote, practice using it in different scenarios. Experiment with different camera settings and modes to see how the remote affects the outcome of your photos. Take the time to learn how to hold the remote steady to minimize camera shake, especially when using longer exposure times or shooting in low light conditions
- Remember, using a wireless remote camera may require additional steps or settings depending on the specific model and brand. Always refer to the camera’s user manual for detailed instructions and troubleshooting tips
Frequently Asked Questions about Wireless Remote Cameras
How secure is the wireless connection between the camera and the remote control?
The wireless connection between the camera and the remote control is designed to be secure. The level of security depends on the specific camera model and the technology used for wireless communication. Many modern cameras employ advanced encryption protocols to protect the wireless connection from unauthorized access and ensure that the transmitted data remains confidential. It is essential to consult the camera’s user manual or contact the manufacturer for detailed information on the security measures implemented in a specific camera model.
What features should I look for when choosing a wireless remote camera?
When choosing a wireless remote camera, there are several important features to consider. Firstly, it is essential to ensure that the camera has reliable wireless connectivity. Look for cameras that support the latest wireless standards such as Wi-Fi 6 (802.11ax) or at least Wi-Fi 5 (802.11ac) for faster and more stable connections.
Another crucial feature to consider is the range of the wireless remote camera. Make sure it has sufficient range to cover the distance between the camera and the device you’ll be using to control it. A longer range allows for greater flexibility in capturing shots from a distance.
Additionally, it is important to check if the camera supports remote control via a mobile app or dedicated software. Having a user-friendly app or software that enables you to control the camera settings, view live images, and even trigger the shutter remotely can greatly enhance your photography experience.
Furthermore, look for cameras that offer a variety of shooting modes and settings that can be accessed and controlled remotely. This includes features like exposure control, focus adjustments, and the ability to switch between shooting modes (e.g., manual, aperture priority, shutter priority, etc.).
Consider the battery life of the wireless remote camera as well. You’ll want a camera that can last for an extended period without needing frequent recharging. This becomes particularly important when shooting in remote locations or during lengthy photography sessions.
Lastly, ensure that the camera you choose is compatible with the devices you plan to use for remote control. Check if it supports both iOS and Android platforms, as this will allow you to use a broader range of devices for controlling the camera remotely.
By considering these features when choosing a wireless remote camera, you can make an informed decision that suits your specific photography needs.
Are there any limitations or interference issues when using a wireless remote camera?
Yes, there can be limitations and interference issues when using a wireless remote camera. Some of the limitations include the range of the wireless signal, potential line-of-sight obstructions, and possible signal interference from other electronic devices or nearby wireless networks.
The range of a wireless remote camera can vary depending on the specific model and manufacturer. Generally, the range can be limited to a few dozen meters or less. If the camera is located too far away from the remote control device, the signal may weaken or become unstable, resulting in a loss of connection.
Line-of-sight obstructions can also affect the performance of a wireless remote camera. If there are physical barriers such as walls, buildings, or other objects between the camera and the remote control device, the signal may be blocked or weakened, leading to a decrease in transmission range or reliability.
Interference from other electronic devices or nearby wireless networks can also cause issues with a wireless remote camera. Certain devices operating on similar frequencies, such as Wi-Fi routers, cordless phones, or Bluetooth devices, can potentially interfere with the wireless signal of the camera, leading to signal degradation or loss.
To mitigate these limitations and interference issues, it is advisable to ensure that the camera and remote control device are within a reasonable range of each other, preferably with minimal obstructions in between. Additionally, selecting a wireless remote camera that operates on less congested or less commonly used frequencies may help reduce the chances of interference from other devices.
One tip I have is to make sure the camera and receiver are in close proximity during the pairing process. I found that this helped to establish a strong connection.
Thank you for sharing your tip! That’s a great suggestion. Keeping the camera and receiver close together can indeed improve the pairing process and ensure a stable connection.
Great guide! It would be helpful if you could also include troubleshooting tips, in case the pairing process doesn’t work initially.
I followed your guide and successfully paired my wireless remote camera with the receiver. The instructions were clear and easy to follow. Thank you!
Thank you for your feedback! We’re glad to hear that the guide was helpful and that you were able to successfully pair your camera and receiver.
It would be great if you could also provide recommendations for compatible wireless remote cameras and receivers in the guide. This would help readers who are looking to purchase new equipment.
Thank you for your suggestion! We appreciate your feedback and will definitely consider adding recommendations for compatible wireless remote cameras and receivers in future articles.