The step-by-step guide, “How to Upgrade and Expand Your Smart Switch System,” aims to provide users with clear instructions on how to enhance and extend their existing smart switch setup. Smart switches are an essential component of home automation, allowing users to control and automate their lights, appliances, and other devices remotely. This guide is designed to help users navigate the process of upgrading their current system by providing easy-to-follow steps and tips for expanding its capabilities. Whether you are a beginner or have some experience with smart switches, this guide can assist you in making the most of your home automation setup.
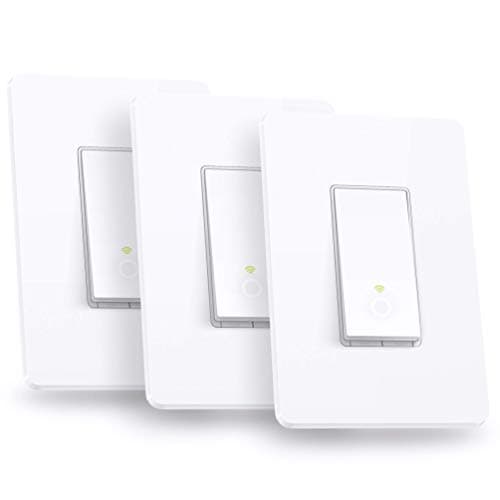
Top-selling smart switches for your home


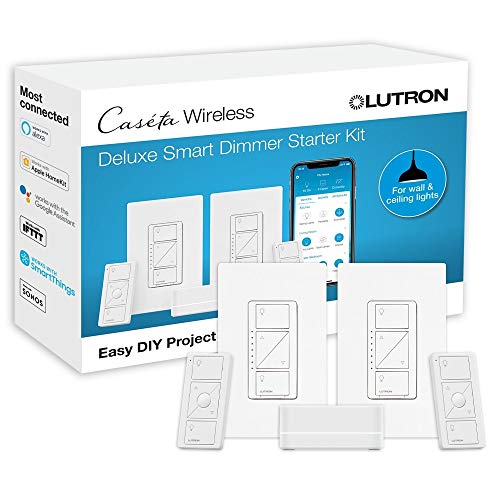
Caséta Smart Hub: Enhancing Control and Expanding Connectivity in Your Smart Home
Step 1: Assess Your Current Smart Switch System
Evaluate your existing smart switch system by assessing its capabilities and limitations. Identify the number of switches, their locations, and the devices they control. This will help you understand the scope of your upgrade and expansion project.


Step 2: Research and Select Compatible Smart Switches
- Conduct thorough research: Start by researching different brands and models of smart switches that are compatible with your existing system. Look for reliable sources such as manufacturer websites, customer reviews, and technology forums. This will help you gather information about the various options available in the market.
- Consider brand reputation: Evaluate the reputation and reliability of the brands you come across during your research. Look for well-established brands that have a track record of producing high-quality smart switches. Brands with positive customer reviews and good customer support are often a safe choice.
- Evaluate features: Carefully consider the features offered by different smart switches and determine which ones are important to you. For example, some switches may have advanced energy monitoring capabilities, voice control compatibility, or integration with other smart home systems. Prioritize features that align with your needs and preferences.
- Check compatibility: Ensure that the smart switches you shortlist are compatible with your existing smart home devices or system. Some switches may only work with certain platforms or require additional components for compatibility. Check the manufacturer’s specifications and compatibility lists to ensure a seamless integration with your existing setup.
Example:
To conduct thorough research, start by visiting manufacturer websites and reading customer reviews for different smart switches. Evaluate the reputation and reliability of the brands you come across. Consider features that are important to you, such as energy monitoring or voice control compatibility. Finally, check the compatibility of the shortlisted switches with your existing smart home devices or system.
Step 3: Plan Your Switch Placement and Wiring
Create a detailed plan by carefully considering the placement of your new switches and the required wiring. Take into account factors such as accessibility, aesthetics, and functionality. Follow the manufacturer’s instructions precisely for proper wiring and installation.
Step 4: Install and Configure New Smart Switches
To install the new smart switches, follow the manufacturer’s instructions carefully. Make sure to connect the wiring correctly and securely mount the switches. Next, configure the switches using the provided mobile app or software, following the manufacturer’s guidelines.
Step 5: Pair and Sync with Existing Smart Switches
To pair the new smart switches with your existing smart switch system, follow these steps:
- Refer to the manufacturer’s instructions to establish a connection between the new and old switches. Typically, this involves putting the new switch into pairing mode and activating the pairing function on the existing switch system.
- Once the switches are paired, proceed to sync the settings and configurations for seamless operation. This may involve transferring settings from the existing switches to the new ones or vice versa. Again, consult the manufacturer’s instructions for specific steps.
By following these instructions, you will successfully pair and sync your new smart switches with your existing smart switch system.
Step 6: Test and Verify Functionality
To test each smart switch, start by turning it on and off multiple times to ensure it functions correctly. Then, verify that the switch is able to control the intended devices by connecting them and checking if the commands from the app or smart home hub are being executed. If any issues arise during this testing phase, troubleshoot them by referring to the troubleshooting section of the user manual or contacting technical support for further assistance.
Step 7: Expand Your Smart Switch System
To expand your smart switch system, you can add additional smart switches if desired. Simply follow steps 2 to 6 for each new switch. It is important to plan the placement of the new switches, install them properly, and configure them correctly to ensure a seamless integration with your existing system.
Step 8: Optimize and Fine-tune Settings
To optimize and fine-tune the settings of your newly installed switches, begin by customizing the automation features to suit your needs. For example, you can set up a schedule to automatically turn on the lights in your living room every morning at 7 am. Additionally, take advantage of any advanced functionalities provided by the smart switch system, such as creating scenes that adjust multiple switches simultaneously. Experiment with different settings until you achieve the desired level of convenience and efficiency.
Final Thoughts
In conclusion, upgrading and expanding your smart switch system requires careful planning, research, and installation. By following these step-by-step instructions, you can enhance the functionality and convenience of your smart home setup. As technology continues to advance, it is important to stay updated and take advantage of the latest features and improvements available for your smart switch system. With a well-designed and expanded system, you can enjoy increased control, energy efficiency, and security in your home. So, take the time to assess your needs, explore compatible devices, and implement the necessary upgrades to create a truly smart and connected home experience.
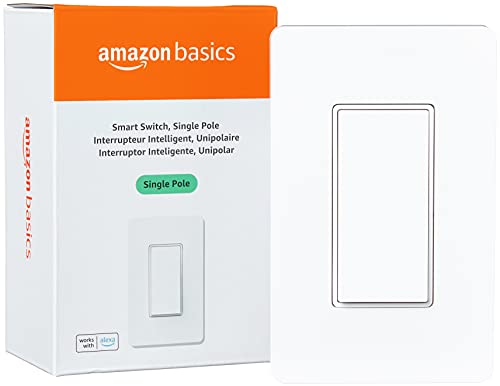
Essential Equipment
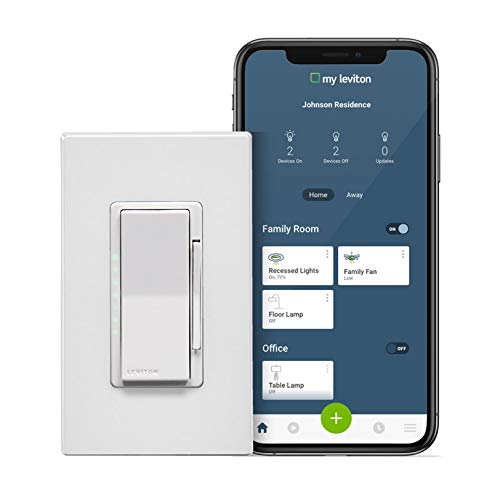


Enhancing Your Smart Switch System
Step-by-Step Guide to Using the Smart Switch
- Ensure that you have a compatible device: Before using the Smart Switch, make sure that your device is compatible with the switch. Check the manufacturer’s specifications or consult the user manual for this information
- Install the Smart Switch app: Download and install the Smart Switch app on your device. You can find it in the app store for your respective operating system (iOS or Android). Follow the on-screen instructions to complete the installation
- Connect the Smart Switch: Once the app is installed, connect your device to the Smart Switch using the provided cables. Make sure the connections are secure and that the switch is powered on
- Launch the Smart Switch app: Open the Smart Switch app on your device. It should detect the connected switch automatically. If not, follow the app’s instructions to establish the connection
- Follow the on-screen instructions: The Smart Switch app will guide you through the process of transferring data from your old device to the new one. Follow the on-screen instructions to select the type of data you want to transfer (contacts, messages, photos, etc.) and initiate the transfer process
- Monitor the transfer process: During the data transfer, keep an eye on the progress displayed on your device’s screen. The time required for the transfer will depend on the amount of data being transferred
- Complete the transfer and disconnect: Once the transfer is complete, you will receive a notification. Follow the app’s instructions to safely disconnect your devices and close the app
- Note: The instructions provided here are general guidelines, and the specific steps may vary depending on the device and Smart Switch model you are using. It is always recommended to consult the user manual or additional resources provided by the manufacturer for detailed instructions
Frequently Asked Questions about Smart Switch
What is the average lifespan of a smart switch?
The average lifespan of a smart switch can vary depending on several factors such as the brand, quality of materials used, and frequency of usage. However, on average, a well-maintained and properly installed smart switch can last between 10 to 15 years. It’s important to note that this estimate is based on general industry knowledge and individual experiences may vary.
Are there any installation requirements or considerations for a smart switch?
Yes, there are installation requirements and considerations for a smart switch. Before installing a smart switch, it is important to ensure that you have a compatible electrical wiring system that meets the specifications of the smart switch manufacturer. It is recommended to consult the manufacturer’s installation instructions and guidelines to understand the specific requirements.
Some common considerations include the type of electrical wiring in your home, the availability of a neutral wire, and the load capacity of the switch. Smart switches usually require a stable Wi-Fi network connection for proper functioning, so ensuring a reliable network signal is also crucial.
Additionally, it is advisable to turn off the power supply to the circuit you’ll be working on before proceeding with the installation. This can be done by turning off the corresponding circuit breaker in your electrical panel. If you are uncertain or uncomfortable with electrical work, it is best to hire a professional electrician to install the smart switch for you to ensure safety and proper functionality.
In Step 4, when it comes to installing and configuring new smart switches, are there any specific tools or equipment that are recommended? I want to make sure I have everything I need before starting the installation process.
When installing and configuring new smart switches, you will typically need basic tools such as a screwdriver, wire stripper, and voltage tester. Additionally, it’s a good idea to have a smartphone or tablet with the corresponding smart switch app installed, as well as a stable Wi-Fi connection for seamless configuration.
That’s a great suggestion! Creating a checklist can definitely help ensure that you don’t miss any important features or overlook any specific requirements during the assessment process. It’s an excellent way to stay organized and make informed decisions.
I’m really interested in learning more about advanced tips for optimizing and fine-tuning settings. Are there any specific features or settings that can significantly enhance the performance or functionality of a smart switch system?
I adapted Step 3 to include a color-coding system for the wiring. By using different colors for different circuits, it’s easier to troubleshoot or make changes in the future. It has saved me a lot of time and confusion!
I’ve found that using smart switches with voice assistants like Amazon Alexa or Google Assistant adds another level of convenience. Being able to control my lights or appliances with just my voice is fantastic!
In Step 7, when expanding the smart switch system, are there any limitations or considerations I should keep in mind? For example, is there a maximum number of switches that can be connected together?
The maximum number of smart switches that can be connected together can vary depending on the specific smart switch system you’re using. It’s always a good idea to consult the manufacturer’s documentation or support resources to determine any limitations or considerations for expanding your particular system.
I found it helpful to make a checklist of all the features and capabilities I want in my smart switch system before assessing my current setup. This way, I can easily identify any gaps and prioritize my upgrade and expansion plans.
Can anyone recommend a particular brand or model of smart switches that they have had a great experience with? I’m looking for reliable switches with advanced features like energy monitoring.
I personally have had a great experience with the Lutron Caseta Wireless Smart Lighting Dimmer Switches. They are reliable, easy to install, and offer energy monitoring capabilities. However, it’s always a good idea to do some research and read customer reviews to find the best smart switches that meet your specific needs and budget.
I recently upgraded my smart switch system and it made a huge difference in terms of convenience and energy savings. I opted for switches that have motion sensors, so they automatically turn on and off when someone enters or leaves a room. It’s been fantastic!
I’ve had a great experience with my smart switch system, but I’m wondering if there are any common issues or challenges that I should be aware of. Any troubleshooting tips you can share?
While smart switch systems are generally reliable, there can be occasional connectivity issues or compatibility conflicts. If you encounter any problems, a common troubleshooting step is to restart the smart switches and the central hub (if applicable). Additionally, checking for firmware updates and ensuring that your Wi-Fi network is stable can help resolve many issues.