The step-by-step guide for installing a smart video doorbell provides clear instructions on how to set up and configure this device. By following this guide, users can ensure a successful installation that enhances their home security and convenience.
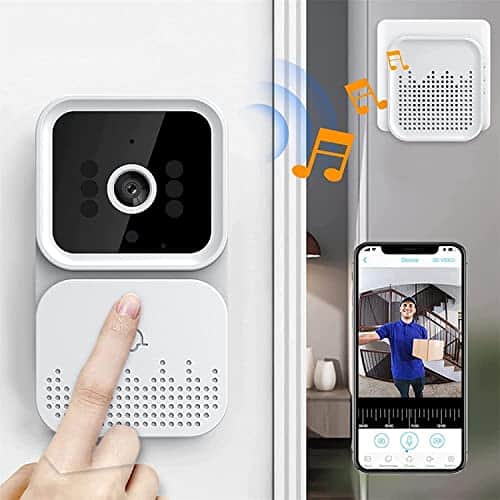
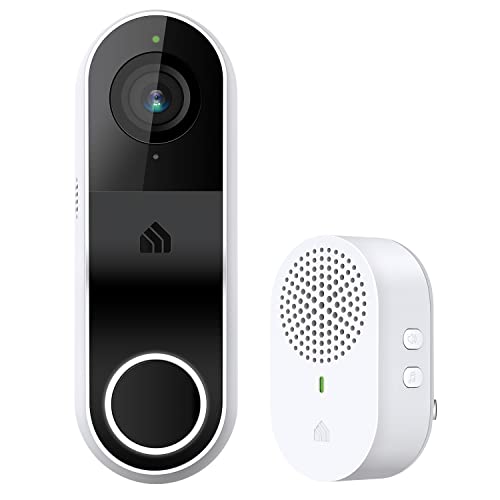
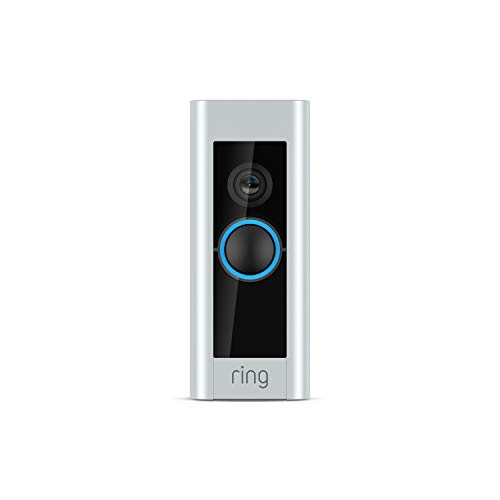
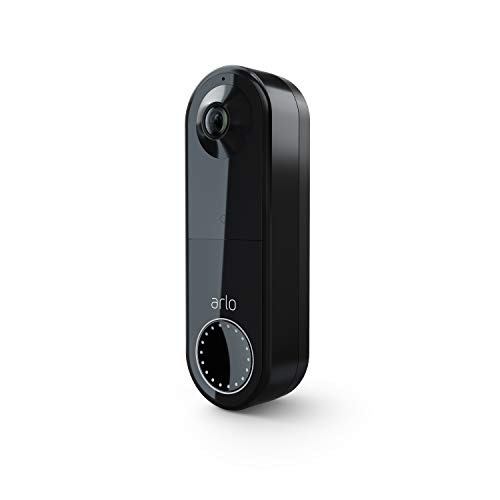
Top-Selling Smart Video Doorbells


Gather the necessary tools and materials
Before beginning the installation process, it is essential to gather all the necessary tools and materials. This will ensure a smooth and efficient installation of your smart video doorbell. Here are the steps to gather the required items:
- Make a checklist: Start by making a checklist of all the tools and materials needed for the installation. This will help you keep track of everything and ensure that nothing is overlooked.
- Check the instruction manual: Refer to the instruction manual provided with the smart video doorbell to identify the specific tools and materials required for installation. The manual will provide a detailed list of everything you will need.
- Screwdriver: Have a screwdriver handy, as it is likely to be one of the essential tools needed for the installation. Make sure it is the correct size and type for the screws provided with the doorbell.
- Drill: Depending on the type of installation, you may need a drill to create holes for mounting the doorbell. Check the instruction manual to determine if a drill is necessary and ensure you have one available.
- Mounting bracket: Many smart video doorbells come with a mounting bracket that helps secure the device in place. Ensure you have the proper mounting bracket included with your doorbell.
- Screws: Check the instruction manual to identify the type and size of screws required for the installation. Make sure you have the correct screws available, as using the wrong ones may result in an insecure installation.
- Smart video doorbell: Lastly, gather the smart video doorbell itself. Double-check that you have received the correct model and ensure it is in good working condition before proceeding with the installation.
By gathering all the necessary tools and materials before beginning the installation process, you can save time and avoid any delays or interruptions. Ensuring you have everything ready will make the installation process more efficient and help achieve a successful outcome.
Choose the installation location
Select a suitable location for your smart video doorbell by considering a few key factors. Firstly, ensure that the chosen spot provides a clear view of your front door. This will enable the doorbell’s camera to capture a wide-angle view and enhance its effectiveness. Additionally, make sure the installation location is within range of your Wi-Fi network to ensure seamless connectivity and functionality.
Next, consider the height at which you will install the video doorbell. A recommended height is approximately 48-56 inches above the ground, which allows for optimal viewing angles and accessibility. This height ensures that the camera captures the faces of visitors, delivery people, or any other activity at your front door accurately.
Moreover, pay attention to the angle at which the video doorbell is installed. Aim for a slight downward tilt, ensuring that the camera captures the area directly in front of your door, including the porch and any immediate surroundings. This angle will provide the most accurate and comprehensive footage.
Lastly, accessibility is key when choosing the installation spot. Ensure that the location allows for easy access to the video doorbell for maintenance and adjustments. Avoid spots that are obstructed by objects or vegetation that may impede the camera’s view.
By carefully considering these factors – clear view, Wi-Fi range, height, angle, and accessibility – you can choose the optimal installation location for your smart video doorbell, enhancing its functionality and ensuring you receive the best possible surveillance footage.
Prepare the doorbell and mounting bracket
Attach the mounting bracket to the doorframe or wall according to the manufacturer’s instructions. Use the provided screws or adhesive to secure the bracket in place. Ensure that the bracket is level and securely attached for optimal functionality.
Next, prepare the smart video doorbell by following the manufacturer’s instructions. This may involve removing any protective film or coverings and making sure that the device is fully charged or has fresh batteries installed.
Once the doorbell and mounting bracket are ready, position the doorbell onto the bracket and secure it into place. Ensure that the doorbell is aligned properly and securely attached to the bracket to prevent any issues with its functionality.
Remember to refer to the manufacturer’s instructions throughout the process to ensure proper installation and setup of your smart video doorbell.
Connect the doorbell to your Wi-Fi network
To connect the smart video doorbell to your home’s Wi-Fi network, follow these steps:
- Download the mobile app or access the web interface: Install the accompanying mobile app on your smartphone or tablet, or open the web interface on your computer. Ensure that you have a stable internet connection.
- Open the app or web interface: Launch the app or access the web interface by clicking on the app icon or typing the provided URL into your web browser.
- Create an account or sign in: If you don’t have an existing account, create one by following the registration process. If you already have an account, simply sign in using your credentials.
- Follow the app’s prompts: Once you are logged in, the app will guide you through the setup process. Pay attention to the on-screen prompts and instructions provided. These may include entering your Wi-Fi network name (SSID) and password, or scanning a QR code on the device.
- Connect to your Wi-Fi network: Follow the app’s instructions to connect the smart video doorbell to your home’s Wi-Fi network. This may involve selecting your network from a list of available options and entering your Wi-Fi password.
- Complete the setup process: Once the doorbell is successfully connected to your Wi-Fi network, the app will confirm the setup process is complete. You can now access the doorbell’s features and settings through the app or web interface.
By following these steps, you will be able to connect your smart video doorbell to your Wi-Fi network easily and securely.
Adjust the doorbell's settings
To adjust the settings of your doorbell, start by connecting it to your Wi-Fi network. Once connected, you can easily access the device settings through either the mobile app or web interface. To configure the options according to your preferences, follow these steps:
- Motion detection sensitivity: Adjust the sensitivity level to receive notifications when motion is detected. Open the settings menu and locate the motion detection option. From there, adjust the sensitivity slider to increase or decrease the sensitivity level. Test different levels to find the optimal setting for your needs.
- Video quality: Enhance your viewing experience by adjusting the video quality of your doorbell. Locate the video settings in the settings menu and select the desired video quality option. Choose from options such as high definition (HD) or standard definition (SD) based on your internet connection and personal preference.
- Notifications: Customize the notifications you receive when someone rings your doorbell or when motion is detected. Access the notification settings and toggle various options such as sound, vibration, or LED alerts. You can also specify the specific events for which you want to receive notifications, such as only when someone approaches your door or all motion events.
By following these simple steps, you can easily adjust the settings of your doorbell to optimize its performance and tailor it to your preferences.
Test the doorbell functionality
To test the doorbell functionality before completing the installation, follow these simple steps:
- Press the doorbell button: Press the button on the smart video doorbell to simulate a visitor ringing the doorbell.
- Check for notifications: After pressing the doorbell button, immediately check your smartphone or any other connected devices for a notification. Look for an alert or message indicating that someone is at the door.
- Verify video and audio: Open the notification and make sure that both the video and audio components are working correctly. Ensure that the video feed displays a clear view of your doorstep and that you can hear any audio coming from the doorbell.
By following these steps, you can confirm that the smart video doorbell is functioning properly and that you will receive timely notifications and clear audio/video feeds when someone rings the doorbell.
Mount the doorbell and secure the wiring
To mount the doorbell and secure the wiring, follow these steps:
- Choose an appropriate location for the doorbell, considering factors such as visibility and accessibility.
- Using the provided screws or other mounting hardware, attach the doorbell securely to the chosen location. Make sure it is level and firmly fixed to avoid any movement.
- If your doorbell requires wiring, carefully route the wires to the desired connection point. Use cable clips or adhesive tape to secure the wiring along the walls or surfaces, keeping it neat and organized.
- Conceal the wiring as much as possible for a clean installation. You can hide it behind baseboards, inside conduits, or use cable covers to maintain a tidy appearance.
- Ensure that all wiring connections are properly made and securely fastened. Double-check for any loose or exposed wires that may pose a safety hazard.
- Test the doorbell again after mounting and securing the wiring to ensure its functionality has not been compromised.
By following these instructions, you can mount your doorbell securely and ensure that the wiring is properly secured and concealed for a professional and clean installation.
Summary and Final Thoughts
In conclusion, I hope that this blog post has provided you with clear and concise instructions on how to install a smart video doorbell. By following these steps, you can enhance your home security and enjoy the convenience of remotely monitoring your front door. With the ability to receive real-time alerts whenever someone approaches, you can have peace of mind knowing that you are in control of your home’s safety. So go ahead and give it a try – install a smart video doorbell today and experience the benefits for yourself.

Can you provide some recommendations for the best smart video doorbells on the market? I’m interested in installing one, but I’m not sure which brand or model to choose.
Sure! Some popular smart video doorbell brands include Ring, Nest, and Arlo. Each brand offers different features and price ranges, so it’s important to consider your specific needs and budget. I would recommend doing some research and reading customer reviews to determine which brand and model would be the best fit for you.
I followed the steps in the guide, but I’m having trouble connecting the doorbell to my Wi-Fi network. I entered the correct network name and password, but it keeps saying ‘connection failed.’ Any suggestions on what I could be doing wrong?
Is there a way to extend the wiring of a smart video doorbell if the original wiring doesn’t reach the desired installation location?
Yes, if the original wiring is not long enough, you can use wire extensions to reach the desired installation location. However, it’s important to ensure that the wire extensions are compatible with the specific brand and model of your smart video doorbell. It’s always a good idea to consult the manufacturer’s instructions or contact their support team for guidance on extending the wiring correctly.
I found that using a power drill made the installation process much easier and faster. It allowed me to quickly drill holes for the mounting bracket without much effort. However, if you don’t have a power drill, you can still use a regular drill or even a screwdriver, although it may take longer. Overall, having the right tools can make a big difference in the installation process.
I’m planning to install multiple smart video doorbells in different locations around my property. Is there a way to manage all of them from a single app or platform?
Yes, most smart video doorbell brands offer apps or platforms that allow you to manage multiple devices from a single interface. For example, the Ring app allows you to add multiple doorbells and view their live feeds and notifications in one place. I would recommend checking the documentation or support resources provided by the brand of your choice to learn more about managing multiple doorbells.
After installing a smart video doorbell, I’ve noticed a significant decrease in package thefts. The doorbell’s motion detection and video recording features have helped deter thieves and provide evidence if any incidents occur. I highly recommend installing a smart video doorbell for added security.
Thank you for sharing your success story! It’s great to hear that the smart video doorbell has been effective in preventing package thefts. It’s definitely a valuable tool for enhancing home security.
Are there any advanced tips for maximizing the functionality of a smart video doorbell? I want to make sure I’m getting the most out of my device.
Certainly! Here are a few advanced tips for maximizing the functionality of your smart video doorbell:
1. Adjust motion detection settings to reduce false alerts.
2. Set up custom motion zones to focus on specific areas of interest.
3. Enable two-way audio to communicate with visitors remotely.
4. Integrate the doorbell with other smart home devices for automation.
By implementing these tips, you can enhance the overall experience and convenience of your smart video doorbell.