Hello there! Have you ever imagined being able to control your lights and appliances with just a tap on your smartphone or a simple voice command? Well, brace yourself, because the future is here! In this blog post, I will be taking you on a journey to discover the wonders of smart switches and guide you through the installation and setup process in easy steps. Whether you’re a tech-savvy enthusiast or simply looking to upgrade your home, this post is your ultimate guide to transforming your living space into a smart haven. So, let’s dive in and unlock the power of smart switches together!
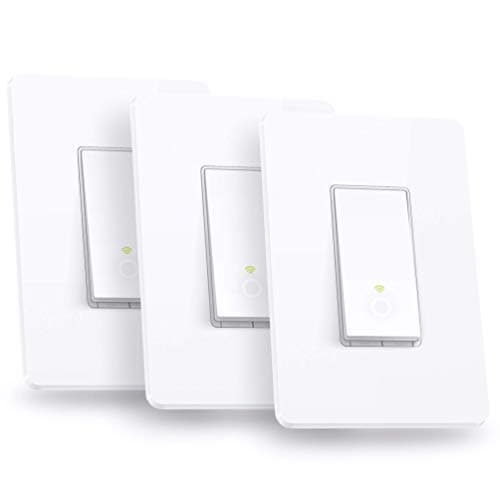
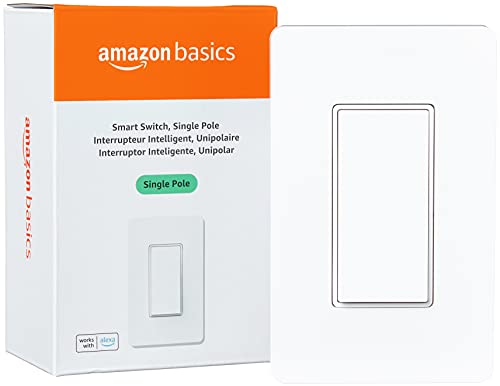
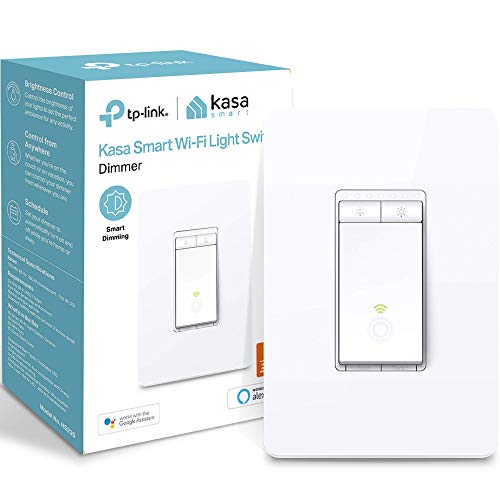
Top Picks in Smart Switches


Understanding Smart Switches
Smart switches are a technological advancement that allows users to control their lights and appliances remotely. These switches are equipped with wireless connectivity, enabling them to communicate with other devices such as smartphones or voice assistants. In this blog section, we will delve into the world of smart switches, explaining what they are, how they work, and their key features.

What are Smart Switches?
Smart switches, also known as Wi-Fi switches or wireless switches, are intelligent devices that replace traditional wall switches. They provide users with the ability to control their lights or appliances from anywhere using a smartphone or voice commands. Smart switches are typically compatible with popular voice assistants like Amazon Alexa or Google Assistant, allowing for seamless integration into a smart home ecosystem.
How do Smart Switches Work?
Smart switches connect to the home’s Wi-Fi network, enabling them to communicate with other devices on the network. Users can control these switches through dedicated mobile applications or voice commands. When a command is issued, the smart switch sends a signal to the connected device, turning it on or off accordingly. This communication can happen locally within the home or remotely over the internet.
Key Features of Smart Switches
Wireless Connectivity
One of the fundamental features of smart switches is their wireless connectivity. This allows users to control their lights or appliances without the need for physical interaction with the switch itself. Instead, users can use their smartphones or voice assistants to send commands to the switch, making it a convenient and user-friendly solution.
Voice Assistant Compatibility
Smart switches are designed to work seamlessly with popular voice assistants such as Amazon Alexa or Google Assistant. This compatibility enables users to control their lights or appliances through voice commands alone. For example, a user could say, “Hey Alexa, turn off the living room lights,” and the smart switch would execute the command accordingly.
Mobile App Control
In addition to voice control, smart switches can also be controlled through dedicated mobile applications. These apps provide users with a user-friendly interface where they can manually turn their lights or appliances on or off. Furthermore, these apps often offer additional features such as scheduling, allowing users to automate their lighting or appliance control based on specific timeframes.
Energy Monitoring
Some smart switches come equipped with energy monitoring capabilities. This feature allows users to track the energy consumption of their connected devices, providing insight into their energy usage habits. By monitoring energy consumption, users can make more informed decisions about their energy usage, potentially leading to cost savings and a reduced carbon footprint.
Compatibility with Existing Switches
Smart switches are designed to replace traditional wall switches seamlessly. They fit into standard switch boxes, making installation a breeze. Additionally, many smart switches retain the functionality of traditional switches, allowing users to control their lights or appliances manually if desired. This compatibility ensures a smooth transition from traditional switches to smart switches while maintaining familiarity for users.
Preparing for Installation
Installing a smart switch can transform your home into a more convenient and efficient space. However, before you begin the installation process, it is important to make a few preparations to ensure a successful and safe installation. In this section, we will outline the necessary steps to help you get ready for the installation of your new smart switch.


1. Check Your Electrical Setup
Before you can install a smart switch, it is essential to check your electrical setup to ensure compatibility. Here are a few key considerations:
- Voltage Compatibility: Determine the voltage rating of your existing electrical system and make sure it matches the voltage requirements of the smart switch you plan to install. Most smart switches are designed for standard 120V electrical systems, but it’s important to verify this before proceeding.
- Wiring Compatibility: Assess the wiring in your home. Smart switches generally require a neutral wire for proper operation. If your current switch does not have a neutral wire, you may need to consult with an electrician to update the wiring. It’s crucial to verify if your existing wiring is compatible with the smart switch you intend to install.
2. Gather the Required Tools
To streamline the installation process, gather the following tools beforehand:
- Wire Stripper: A wire stripper will help you remove the insulation from the wires, allowing for proper connection.
- Screwdriver: Depending on the smart switch model, you may need a Phillips or flathead screwdriver to remove the existing switch and install the new one.
- Voltage Tester: A voltage tester is essential to confirm that the power to the switch is turned off before you begin any work.
- Wire Connectors: Wire connectors, such as wire nuts or Wago connectors, are used to secure the electrical connections between your existing wiring and the smart switch.
- Electrical Tape: Electrical tape can be used to insulate and protect the wire connections once they are securely fastened.
3. Ensure Compatibility with Existing Wiring
Before purchasing a smart switch, it is crucial to ensure compatibility with your existing wiring. Here are a few steps to follow:
- Research: Take note of the type of wiring in your home and research smart switches that are compatible with your specific wiring setup. For example, if you have a three-way switch configuration, ensure that the smart switch you choose supports this setup.
- Consult the Manufacturer: Reach out to the manufacturer of the smart switch you are considering and provide them with details about your existing wiring. They can guide you in selecting the right product for your needs.
Installing the Smart Switch
In this step-by-step guide, we will walk you through the process of installing a smart switch in your home. By following these instructions, you’ll be able to upgrade your traditional switch and enjoy the convenience and energy efficiency of a smart switch. Let’s get started!
Step 1: Turn off the Power
Before beginning any electrical work, it is crucial to ensure your safety by turning off the power to the circuit you’ll be working on. Locate the circuit breaker panel in your home and switch off the breaker that corresponds to the room where the switch is located. Double-check that the power is indeed off using a non-contact voltage tester.
Step 2: Remove the Old Switch
Once you’ve confirmed that the power is off, remove the faceplate covering the old switch. Unscrew the switch from the electrical box using a screwdriver. Carefully pull the switch out, ensuring that the wires don’t get tangled or damaged.
Step 3: Connect the Wires to the New Switch
Now it’s time to connect the wires to the new smart switch. Most smart switches come with clear instructions, but the basic wiring process is as follows:
- Identify the different wires: You will typically find three wires – a black (hot) wire, a white (neutral) wire, and a green or copper (ground) wire.
- Connect the black wire: Attach the black wire from the electrical box to the black wire on the smart switch. This wire carries the power.
- Connect the white wire: Connect the white wire from the electrical box to the white wire on the smart switch. This wire provides the neutral connection.
- Connect the ground wire: Finally, connect the green or copper wire from the electrical box to the green or copper wire on the smart switch. This wire is essential for grounding.
Step 4: Secure the Smart Switch in Place
After connecting the wires, carefully push the smart switch into the electrical box. Use the screws provided with the switch to secure it in place. Make sure it sits flush against the wall and that there are no loose wires.
Step 5: Test the Switch
Before restoring power, it is crucial to test the smart switch to ensure it is functioning correctly. Follow the manufacturer’s instructions to check if the switch is properly connected to your home’s Wi-Fi network and if the accompanying mobile app is working as expected. Test the switch by turning it on and off to confirm that it controls the connected lights or appliances.
Setting Up and Configuring the Smart Switch
Now that you have successfully installed your smart switch, it’s time to set it up and configure it to work seamlessly with your smartphone or voice assistant. This section will guide you through the step-by-step process, ensuring that you can control your switch with ease. Let’s get started!
Step 1: Download and Install the App
To control your smart switch, you need to download and install the corresponding app on your smartphone. The app acts as the control center, allowing you to customize settings and manage your switch remotely. Follow these simple steps to get started:
- Open the App Store or Google Play Store on your smartphone.
- Search for the app specific to your smart switch brand or model, such as “Ninja Smart Switch” or “Salomon Switch Control.”
- Tap the “Install” or “Get” button to download the app.
- Once the installation is complete, open the app and create an account if necessary.
Step 2: Connect to Your Home Wi-Fi Network
Now that you have the app installed, it’s time to connect your smart switch to your home Wi-Fi network. This step ensures that you can control the switch remotely without any issues. Follow these steps to establish a connection:
- Launch the app on your smartphone.
- Tap on the “Add Device” or similar option within the app.
- Follow the on-screen instructions to put your smart switch into pairing mode.
- Once the switch is in pairing mode, the app will automatically detect it.
- Select your home Wi-Fi network from the list and enter the password when prompted.
- Wait for the app to establish a connection between your smart switch and the Wi-Fi network. This process may take a few minutes.
Step 3: Customize Settings
Congratulations! Your smart switch is now successfully connected to your home Wi-Fi network. It’s time to customize the settings according to your preferences. This step allows you to personalize your smart switch and make it work exactly the way you want. Here are some essential settings you might want to consider:
- Scheduling: Set timers or schedules to automate when your switch turns on or off. For example, you can schedule your Ninja Coffee Maker XL Pro to start brewing coffee every morning at 7 a.m.
- Voice Control: If your smart switch is compatible with voice assistants such as Amazon Alexa or Google Assistant, you can enable voice control. This feature allows you to control your switch by simply giving voice commands. For instance, you can say “Hey Google, turn off the Salomon Speedcross 5 Running Shoes.”
- Energy Monitoring: Some smart switches offer energy monitoring capabilities, allowing you to track the energy consumption of connected devices. This feature helps you identify energy-hungry devices and make informed decisions to save energy and reduce costs.
Key Takeaways and Final Thoughts
In conclusion, the installation and setup of a smart switch are simple tasks that offer numerous advantages in terms of convenience and productivity within your household. By adhering to the step-by-step instructions provided in this blog post, you will be able to reap the benefits of smart home technology. It is advisable to take into account factors such as compatibility, features, and user-friendliness when selecting a smart switch for your residence.
Great article! I recently installed a smart switch in my home and it has made a big difference in convenience and energy savings.
I would love to see some recommendations for reliable smart switch brands or models. There are so many options out there and it can be overwhelming to choose one.
I’ve heard that some smart switches can be difficult to set up and configure. Is there a particular brand or model that you recommend for easier installation?
Could you provide more details on the compatibility of smart switches with different light fixtures? I have some older fixtures and I’m not sure if they would work with a smart switch.
Sure! Smart switches are generally compatible with most standard light fixtures, including older ones. However, it’s always a good idea to check the specifications of the smart switch and consult with the manufacturer or an electrician if you have any concerns.
I installed a smart switch in my outdoor lighting system and it’s been amazing! I can control the lights from my phone and even set up schedules for them. It’s made my life so much easier.
One tip I would add is to make sure your Wi-Fi signal is strong in the area where you plan to install the smart switch. Weak Wi-Fi can cause connectivity issues.
That’s a great tip! Thank you for sharing. Strong Wi-Fi signal is indeed important for smooth operation of smart switches.