The step-by-step guide “How to install smart lighting in my home” aims to provide a comprehensive overview of the process involved in setting up smart lighting systems. This guide is designed to assist individuals who are interested in upgrading their home lighting to a more efficient and intuitive system. It covers everything from understanding the benefits of smart lighting to selecting the right products and installing them correctly. By following this guide, readers will be able to successfully transform their home lighting into a smart and convenient solution.
Top Picks for Smart Home Lighting


Gather the necessary tools and equipment
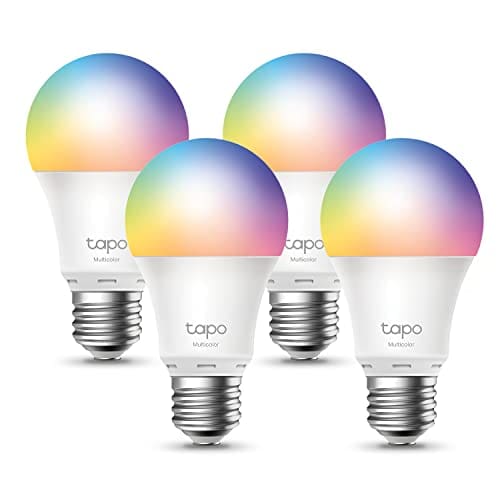
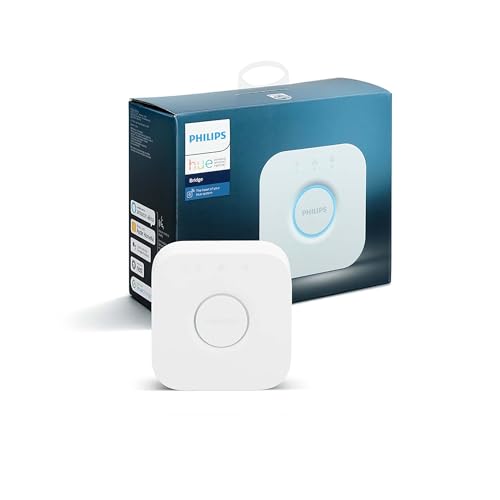
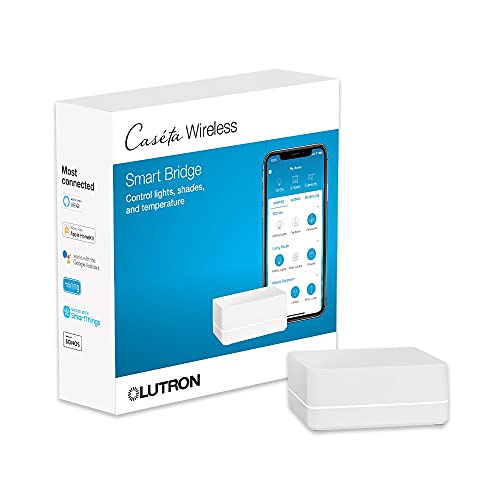
Before starting the installation process, gather all the necessary tools and equipment. Begin by ensuring you have the required smart light bulbs, which are essential for integrating your lighting system with smart technology. Additionally, you will need a smart lighting hub or bridge, depending on the specific setup. This device acts as a central control unit, allowing you to connect and manage your smart light bulbs.
Next, make sure you have a smartphone or tablet with the compatible app installed. This app will serve as your interface for controlling and customizing your smart lighting system. It is important to have a stable internet connection to ensure uninterrupted communication between your smart devices. Finally, depending on your installation requirements, you may need additional wiring or connectors to properly connect and install the smart light bulbs and the lighting hub.
By gathering all these essential tools and equipment, you will be well-prepared to begin the installation process.


Choose the location for your smart lighting
Decide which areas of your home you want to install the smart lighting. Begin by assessing the different spaces in your home and considering their usability, functionality, and aesthetics. Think about the rooms where you spend the most time and where having smart lighting would be most beneficial. For example, you may want to prioritize installing smart lighting in your living room, kitchen, bedroom, or home office.
Once you have identified the areas where you want to install smart lighting, take into account the range of the smart lighting system you are considering. Ensure that the system can cover the desired areas effectively. Keep in mind that the range can vary depending on the specific smart lighting product you choose. To determine the range, refer to the product specifications provided by the manufacturer. This will help you ensure that the smart lighting system you select is capable of providing coverage to all the areas you want to install it in, without any dead zones or gaps in lighting.
Install the smart lighting hub or bridge
Follow the manufacturer’s instructions to install the smart lighting hub or bridge. Start by locating a suitable spot for the device near your Wi-Fi router or modem. Ensure the hub or bridge is within range of your smart bulbs and has a stable internet connection. Here are the steps to install the smart lighting hub or bridge:
- Connect the hub or bridge to a power source using the provided power adapter.
- Use an Ethernet cable to connect the hub or bridge to your Wi-Fi router or modem.
- Wait for the hub or bridge to power on and establish a connection with your network. This may take a few minutes.
- Download the corresponding mobile app for your smart lighting system from the App Store or Google Play Store.
- Launch the app and follow the on-screen instructions to create a new account or log in to your existing account.
- Once you are logged in, the app should guide you through the process of connecting the hub or bridge to your account. This typically involves scanning a QR code or entering a unique code provided with the device.
- After successfully connecting the hub or bridge to your account, you can proceed to add your smart bulbs to the system. The app will provide instructions on how to do this, which may involve scanning QR codes on the bulbs or using other pairing methods.
By following these steps, you will be able to install the smart lighting hub or bridge and establish a connection between your smart bulbs and your smartphone or tablet. This will enable you to control your lights remotely, set schedules, and customize lighting scenes to enhance your home automation experience.
Replace the existing light bulbs with smart bulbs
Turn off the power to the existing light fixtures by locating the circuit breaker or switch that controls the electricity supply to the specific area. Flip the switch or turn off the breaker to cut off the power. This step is crucial to ensure your safety while replacing the light bulbs.
Next, carefully remove the old light bulbs by gently twisting them counterclockwise until they come loose from the socket. Take caution not to apply excessive force or twist too vigorously to prevent damaging the fixture. Once the old bulbs are removed, set them aside or dispose of them properly.
Now, it’s time to replace the old bulbs with the smart bulbs. Ensure that the smart bulbs you are using are compatible with the fixture and fit properly. Refer to the manufacturer’s instructions or any included documentation to determine the compatibility. Take note of the bulb type, size, and any additional requirements specified by the manufacturer. Insert the smart bulbs into the socket, and gently twist them clockwise until they are securely in place.
After replacing all the old bulbs with the smart bulbs, turn the power back on by flipping the switch or turning the breaker back on. Once the power is restored, test the functionality of the smart bulbs by turning on the light switch. Check if the bulbs illuminate and respond to any smart features, such as dimming or color changes, if applicable. If the bulbs are not functioning correctly, refer to the manufacturer’s troubleshooting guide or contact their customer support for assistance.
Set up and configure the smart lighting system
Download the compatible app for your smart lighting system on your smartphone or tablet. Open your device’s app store and search for the app by typing its name in the search bar. Once you find the app, tap on the “Install” or “Get” button to download it. Wait for the app to finish installing on your device.
Follow the app’s instructions to connect the smart lighting hub or bridge to your device. Launch the app and sign in or create a new account if required. Look for the option to add a new device or connect a hub/bridge. Tap on it and select the type of hub/bridge you have from the list. Follow the on-screen prompts to put your hub/bridge into pairing mode and wait for it to be detected by the app. Once the app successfully detects your hub/bridge, it will guide you through the process of connecting it to your device’s Wi-Fi network.
Use the app to customize and control your smart lighting. After successfully connecting your smart lighting hub/bridge, the app will provide you with various options to personalize your lighting experience. Explore the app’s settings to adjust brightness levels, change colors, and create scenes. You can also set schedules to automate your lighting based on specific times or events. Enjoy the convenience of controlling your smart lighting system from the palm of your hand with just a few taps on the app.
Final thoughts and recommendations
In conclusion, installing smart lighting in your home is a worthwhile investment that offers numerous benefits. By following the steps outlined in this guide, which include gathering the necessary tools, choosing the right location, installing the hub or bridge, replacing the bulbs, and configuring the smart lighting system, you can enjoy the convenience, energy efficiency, and home automation that smart lighting provides. With the ability to control your lights remotely, schedule lighting scenes, and adjust brightness levels, smart lighting enhances your home environment while reducing energy consumption. So, take the leap and transform your home with smart lighting today.
Recommended Tools

Expert Advice
Step-by-Step Guide to Using Smart Lighting in Your Home
- Start by choosing the right smart lighting system for your home. There are various options available in the market, so make sure to research and select one that suits your needs and budget
- Install the smart lighting system according to the manufacturer’s instructions. This may involve replacing traditional light bulbs with smart bulbs or installing smart switches or plugs
- Connect the smart lighting system to your home’s Wi-Fi network. Most smart lighting systems require a stable internet connection to function properly
- Download and install the corresponding mobile app for your smart lighting system on your smartphone or tablet. This app will act as your control center for managing and configuring your smart lights
- Explore the features of the mobile app and familiarize yourself with the different settings and options available. You can typically control the brightness, color, and scheduling of your smart lights through the app
- Experiment with different lighting scenes and settings to find the ambiance that suits your preferences. Some smart lighting systems offer pre-set scenes or allow you to create your own customized scenes
- Consider integrating your smart lighting system with other smart home devices or voice assistants, such as Amazon Alexa or Google Assistant. This will allow you to control your lights using voice commands or automate them based on certain triggers or schedules
- Don’t forget to regularly update the firmware of your smart lighting system and the corresponding app to ensure you have the latest features and security patches
This article mentioned using smart lighting for energy efficiency. How much energy can I save by switching to smart lighting?
I already have some smart home devices. Will I need to upgrade my smart hub to install smart lighting?
Are there any privacy concerns with smart lighting? I’ve heard that some systems can track your usage.
I’m excited to try out smart lighting in my home. Thanks for the detailed guide!
What are the benefits of smart lighting compared to traditional lighting?
Do you have any recommendations for affordable smart lighting brands?
I’m worried about the installation process. Is it difficult to set up smart lighting on my own?
I’m interested in controlling my lighting with voice commands. Can I connect smart lighting to virtual assistants like Alexa or Google Home?
I love the idea of scheduling my lights to turn on and off automatically. Can I set different schedules for different rooms?
What happens if my internet connection goes down? Will I still be able to control my smart lighting?
Is it possible to dim the smart lights? I prefer softer lighting in the evenings.
Great article! I’ve been wanting to install smart lighting in my home and this guide seems really helpful.
I didn’t realize there were so many different types of smart lighting systems available. This article helped me understand the options better.