In this step-by-step guide, I will walk you through the process of adding new devices to your voice-controlled home automation system. By following these instructions, you will be able to easily expand your system and enhance your smart home experience. Let’s get started!
Top-Selling Smart Home Solutions


Check compatibility
Before adding a new device to your voice-controlled home automation system, it is crucial to check its compatibility. This step ensures that the device will work seamlessly with your existing system and avoid any potential issues or conflicts. To determine compatibility, you can refer to the manufacturer’s specifications or consult the documentation provided with your home automation system.
For example, if you are considering adding a smart thermostat to your system, you should check if it is compatible with your specific voice-controlled system. Look for information on supported communication protocols, such as Wi-Fi or Zigbee, and ensure that the thermostat is certified to work with your home automation system.
Similarly, if you plan to integrate smart lights into your setup, verify if they are compatible with your voice-controlled system. Check if the lights use a compatible wireless protocol, such as Bluetooth or Z-Wave, and if they can be controlled through the voice commands supported by your automation system.
By taking the time to verify compatibility before adding a new device, you can avoid potential frustration and save yourself from purchasing a device that may not work with your voice-controlled home automation system.

Prepare the device
- Charge the device: Before integrating the new device, ensure it has sufficient battery power. Connect the device to a power source using the provided charger and cable. Allow it to charge fully, following the manufacturer’s instructions. This will ensure uninterrupted usage during the setup process.
- Connect to power: If the device requires a continuous power supply, connect it to a power outlet using the appropriate power cable. Make sure the power source is stable and reliable to prevent any disruptions during the integration process.
- Install necessary software or apps: Check if the device requires any specific software or applications for proper functionality. Follow the manufacturer’s guidelines to install the necessary software or apps on your device. This may involve downloading and installing from an app store or using installation files provided by the manufacturer.
By following these steps, you can ensure that your new device is properly set up, charged, connected to power, and equipped with any necessary software or apps. This will ensure a smooth integration process and allow you to make the most out of your device’s features and functionalities.
Connect to the network
To connect your new device to the same network as your voice-controlled home automation system, follow these steps:
- Wi-Fi Connection:
- Go to the settings menu on your new device.
- Select the “Wi-Fi” option.
- Find and select your home Wi-Fi network from the available list.
- Enter the network password if prompted.
- Wait for the device to connect to the Wi-Fi network. Once connected, you should see a confirmation message or Wi-Fi symbol on the screen.
- Ethernet Connection:
- Locate the Ethernet port on your new device.
- Connect one end of the Ethernet cable to the device’s Ethernet port.
- Connect the other end of the Ethernet cable to an available Ethernet port on your router or modem.
- Wait for the device to establish a connection. You may see a blinking indicator light on the Ethernet port.
By following these instructions, you will ensure that your new device is connected to the same network as your voice-controlled home automation system. This will allow seamless integration and smooth operation between the devices.
Discover new devices
To discover new devices, open the voice-controlled home automation system’s app or interface. From there, navigate to the device discovery section. Once you’re in the device discovery section, follow the instructions provided to initiate the device discovery process.
During the device discovery process, the system will scan for new devices that are compatible with the home automation system. This is done to ensure that all available devices are detected and can be controlled through the system.
To initiate the device discovery process, simply click on the “Start” or “Discover” button within the app or interface. This will prompt the system to begin scanning for new devices.
Make sure that the device you want to discover is powered on and within range of the home automation system. Some devices may require additional steps, such as putting them into pairing mode or connecting them to the same Wi-Fi network as the home automation system.
Once the device discovery process is complete, the newly discovered devices will be listed in the app or interface. You can then proceed to configure and control these devices according to your preferences.
Remember to follow any specific instructions or prompts provided by the app or interface during the device discovery process to ensure a seamless experience.
Put the new device in pairing mode
To put the new device in pairing mode, follow the manufacturer’s instructions provided with the device. This mode enables the device to be detected and connected to the voice-controlled home automation system effortlessly.
Start by locating the user manual or instruction booklet that came with the device. In the manual, you will find specific steps to activate the pairing mode. It is crucial to follow these instructions as different devices may have varying methods to enter pairing mode.
Typically, you will need to access the device’s settings or control panel. Look for an option such as “Pairing,” “Connect,” or “Bluetooth/Wi-Fi setup.” Once you have found the appropriate menu, select it to proceed.
In the menu, you may be prompted to press a specific button or combination of buttons on the device. For example, you might need to press and hold a designated “Pair” button or a combination of buttons for a few seconds until a light indicator starts flashing or the device enters a specific mode.
Pay close attention to any on-screen instructions or indicators that may appear during this process, as they may provide additional guidance or confirm that the device is now in pairing mode.
After successfully activating the pairing mode, your device should be ready to connect to the voice-controlled home automation system. Follow the next steps in the system’s setup instructions to complete the pairing process and enjoy the seamless integration of your new device.
Add the device
To add a new device to your voice-controlled home automation system, follow these simple steps:
- Put the device in pairing mode: Refer to the device’s user manual to learn how to activate pairing mode. For example, press and hold the power button for 5 seconds until the LED starts flashing.
- Open the home automation system app: Launch the app on your smartphone or tablet that is connected to the same Wi-Fi network as your home automation hub.
- Navigate to the device setup screen: Look for the “Add Device” or “Pair New Device” option within the app’s menu. Tap on it to proceed.
- Let the system detect the device: Ensure that your new device is within range of the home automation hub. The system will automatically scan for nearby devices in pairing mode.
- Follow on-screen prompts: Once the system detects the device, it will display a list of available devices. Select the device you want to add and follow the on-screen prompts to complete the pairing process. This may involve confirming a passcode or entering specific device details.
- Test the device: After successfully adding the device, test its functionality to ensure it is working as expected. For example, if you added a smart light bulb, try turning it on and off using voice commands or the app.
Remember, the process may vary slightly depending on your specific voice-controlled home automation system and the device you are adding. Always refer to the device and system’s documentation for detailed instructions.
Test and configure
After successfully adding the device, test its functionality by issuing voice commands. Ensure that the device is connected to a power source and turned on. Speak clearly and audibly towards the device, giving it simple commands to follow. For example, say “Hey device, turn on the lights” or “Hey device, play some music.” Observe if the device responds promptly and performs the requested actions accurately. If the device does not respond or fails to perform the desired actions, check the device’s connection and troubleshoot any potential issues.
If necessary, configure any additional settings or preferences through the system’s app or interface. Download and install the device’s dedicated app from the respective app store. Launch the app and follow the on-screen instructions to connect the app to the device. Once connected, explore the app’s settings and preferences to customize the device according to your preferences. For example, you can adjust sound settings, enable or disable certain features, or personalize voice recognition. Make sure to save any changes or settings you make in the app before exiting.
Key Takeaways
In conclusion, adding new devices to your voice-controlled home automation system is a simple and efficient process. By carefully following the steps outlined in this blog post, you can easily expand the capabilities of your system and enjoy the convenience and control that it offers. So go ahead and start exploring new devices to enhance your home automation experience.
One tip I have for anyone following this guide is to make sure you have a strong and stable Wi-Fi connection. I had some issues connecting a new device because my Wi-Fi signal was weak in that area of my house. Once I moved closer to the router, the device connected without any problems.
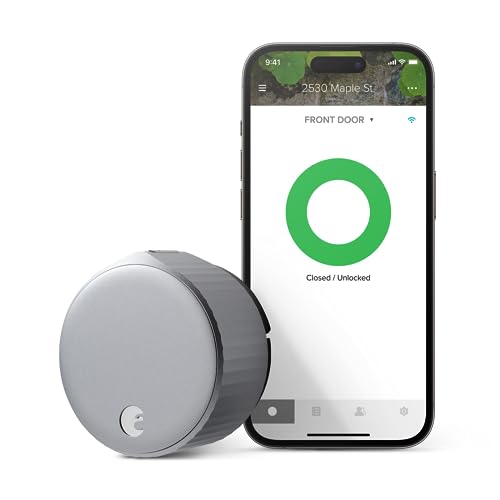
I added a smart lock to my home automation system using this guide and it has been a game changer. Now I can lock and unlock my front door with just a voice command. It’s so convenient, especially when I have my hands full. I highly recommend trying this out!
I have a specific device that I want to add to my home automation system, but I’m not sure if it’s compatible. It’s a Belkin WeMo Smart Plug. Can anyone confirm if this device can be added using this guide?
I followed this guide to add a new smart bulb to my voice-controlled home automation system and it worked perfectly! The instructions were clear and easy to follow, and within minutes I had the bulb connected and working. Now I can control the brightness and color of the bulb with just my voice. This guide saved me a lot of time and frustration, thank you!