The step-by-step guide titled “How to Maintain and Clean Your Smart Air Purifier” provides essential instructions for effectively maintaining and cleaning a smart air purifier. This guide aims to assist users in keeping their air purifiers in optimal condition, ensuring they continue to provide clean and healthy air.
Top-rated air purifiers for clean air


Step 1: Unplug the Air Purifier
Before starting any maintenance or cleaning, unplug the smart air purifier from the power source to ensure safety. Simply locate the power cord at the back of the air purifier and gently disconnect it from the electrical outlet. This step will help prevent any electrical accidents or damage while working on the air purifier.


Step 2: Remove the Filters
To remove the filters from the air purifier, carefully follow these steps:
- Turn off the air purifier and unplug it from the power source.
- Refer to the user manual to identify the types of filters used in your specific model.
- Locate the filter compartment, which is usually located at the back or side of the air purifier.
- Open the filter compartment by either sliding, pushing, or twisting the cover, depending on the design of your air purifier.
- Take note of the positioning of the filters and any tabs or locks that may be holding them in place.
- Gently remove each filter by grasping it firmly and pulling it straight out.
- Inspect the filters for any visible dirt, dust, or damage. If necessary, clean or replace the filters following the instructions provided in the user manual.
- Once the filters have been removed, close the filter compartment securely.
- Before using the air purifier again, make sure the filters are properly cleaned or replaced and the filter compartment is securely closed.
Step 3: Vacuum the Filters
To properly vacuum the filters, follow these steps:
- Attach the brush accessory to your vacuum cleaner.
- Gently run the brush over the surface of the filters, removing any dust and debris.
- Pay attention to not apply too much pressure or use excessive force, as this could damage the filters.
- Ensure that you cover the entire surface of the filters, including the corners and edges.
- After vacuuming, inspect the filters to make sure they are clean and free from any remaining particles.
- If necessary, repeat the process until the filters are thoroughly cleaned.
Step 4: Wash the Filters
If your filters are washable, follow the manufacturer’s instructions to clean them. Start by using lukewarm water and mild detergent to gently wash away any remaining dirt or particles. Ensure that you thoroughly rinse the filters to remove all traces of detergent. Next, allow the filters to fully dry before reinstalling them into your device. Remember, it is crucial to follow the manufacturer’s guidelines for proper maintenance and cleaning.
Step 5: Clean the Exterior
Wipe down the exterior of the air purifier using a soft, damp cloth. This will help remove any dust or dirt that may have accumulated on the surface. For example, gently move the cloth in a back and forth motion across the front panel and sides of the purifier. Be sure to avoid using harsh chemicals or abrasive materials, as these can cause damage to the surface.
Step 6: Clean the Air Vents
To clean the air vents, use a small brush or a vacuum cleaner with a brush attachment. Gently brush or vacuum the vents to remove any dust or debris that may have accumulated. This will ensure proper airflow and enhance the efficiency of the air purifier.
Step 7: Reinstall the Filters
To reinstall the filters, follow these steps:
- Ensure the filters are dry: Before reinstalling the filters, make sure they are completely dry. This will help prevent any damage or malfunction during the installation process.
- Identify the correct order and position: Take note of how the filters were originally placed and the order in which they were removed. Most filters are designed to fit in a specific way, so it’s important to reinstall them correctly for optimal performance.
- Carefully place the filters back in position: Start by aligning the filters with their corresponding slots or compartments. Slowly and gently slide the filters back into place, making sure they are securely seated.
- Check for proper fit: After reinstalling the filters, give them a gentle push or tug to ensure they are firmly in place. Double-check that they are snug and won’t easily dislodge.
By following these steps, you can safely and effectively reinstall the filters in the correct order and position, ensuring they are securely in place before proceeding with any further steps.
Step 8: Plug in and Test
Step 8: Plug in and Test.
- Plug the air purifier into a working electrical outlet.
- Example: Plug the power cord of the air purifier into a nearby wall socket.
- Turn on the air purifier using the power button or switch.
- Example: Press the power button located on the control panel to turn on the air purifier.
- Observe the air purifier for any unusual noises or error messages.
- Example: Listen carefully for any unfamiliar sounds such as buzzing or rattling.
- Check the display panel or indicator lights for any error messages.
- Example: Look for error codes or warning symbols on the digital display.
- If everything appears to be functioning properly and no issues are detected, you can proceed to use the air purifier.
- Example: If the air purifier turns on without any unusual sounds or error messages, it is ready for use.
Note: If you encounter any problems or the air purifier does not work as expected, refer to the user manual or contact customer support for assistance.
Step 9: Regular Maintenance
Step 9: Regular Maintenance
To maintain optimal performance of your smart air purifier, it is essential to follow a regular maintenance schedule. Here are the steps to keep your air purifier in good working condition:
- Check and replace filters: Begin by checking the filters regularly to ensure they are clean and free from dust and debris. If the filters are dirty or clogged, it is recommended to replace them according to the manufacturer’s guidelines.
- Clean the exterior: Wipe the exterior of the air purifier using a soft, damp cloth. Avoid using abrasive cleaners or solvents that may damage the surface. This will help to remove any dust or dirt particles that have accumulated on the exterior.
- Clean the vents: Use a vacuum cleaner or a soft brush attachment to gently clean the vents of the air purifier. This will prevent the accumulation of dust and improve the airflow.
- Ensure proper airflow: Make sure that the air purifier is placed in a location that allows for proper airflow. Avoid blocking the vents or placing the purifier in a confined space as this can hinder its performance.
By following these regular maintenance steps, you can extend the lifespan of your smart air purifier and ensure that it continues to effectively purify the air in your surroundings.
Final Thoughts
In conclusion, I have provided you with a concise set of instructions on how to effectively maintain and clean your smart air purifier. By following these steps, you can prolong the lifespan of your device and ensure that it continues to provide clean and fresh air in your environment. Regular maintenance is key to keeping your air purifier in optimal condition and maximizing its performance. So, take the time to follow these guidelines and enjoy the benefits of a well-maintained and clean air purifier.
Necessary Supplies


Effective Maintenance Tips
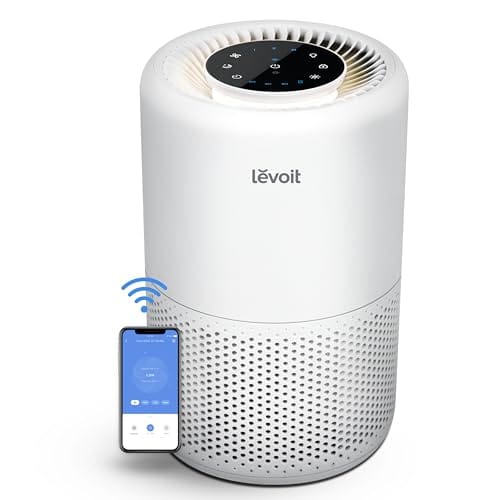
Using the Smart Air Purifier
- Plug in the smart air purifier to a power source
- Download and install the accompanying mobile app on your smartphone
- Connect the air purifier to your home Wi-Fi network using the app
- Place the air purifier in a central location within the room you want to purify
- Use the mobile app to control and monitor the air purifier remotely. Adjust settings such as fan speed, timer, and mode
- Regularly replace the air filters as per the manufacturer’s instructions to maintain optimum performance
Frequently Asked Questions about Smart Air Purifiers
Does a smart air purifier have the ability to provide real-time air quality data and notifications?
Yes, a smart air purifier has the ability to provide real-time air quality data and notifications. Smart air purifiers are equipped with sensors that continuously monitor the air quality in the surrounding environment. These sensors detect various pollutants such as dust, allergens, pet dander, and volatile organic compounds (VOCs). The air purifier then analyzes the data collected by these sensors and provides real-time information on the air quality through its companion mobile application or display panel. Additionally, smart air purifiers can send notifications to the user’s smartphone or other connected devices, alerting them about changes in air quality or when filters need to be replaced. This feature allows users to stay informed about the air they breathe and take necessary actions to maintain a healthier indoor environment.
Can a smart air purifier be integrated with other smart home devices or systems?
Yes, a smart air purifier can be integrated with other smart home devices or systems. Many smart air purifiers come with Wi-Fi connectivity and can be paired with smart home platforms such as Amazon Alexa, Google Assistant, or Apple HomeKit. This allows users to control and monitor their air purifiers remotely using voice commands or smartphone apps. Additionally, some smart air purifiers can be integrated with other smart devices in your home, such as smart thermostats, to enhance the overall efficiency and automation of your home’s air quality management.
Can you recommend any specific brand of air purifier filters that are compatible with most smart air purifiers? I want to make sure I get the right ones.
Certainly! Some popular brands that offer compatible filters for smart air purifiers are Honeywell, Levoit, and Coway. It’s always a good idea to check your air purifier’s manual or the manufacturer’s website for recommended filter options.
After following this guide, my smart air purifier is working like new again! The steps were easy to follow, and I appreciate the tips for regular maintenance.
One tip I have for smart air purifiers is to connect them to a smart home system. It makes it much more convenient to control and monitor the air quality from anywhere.
I’m a bit confused about Step 4. How should I wash the filters? Can I use soap and water or do I need a special cleaning solution?
I’ve found that using a handheld vacuum with a brush attachment works great for Step 3. It helps remove dust and debris from the filters more effectively.
That’s a fantastic suggestion! Using a handheld vacuum with a brush attachment can indeed be a more efficient way to clean the filters. Thank you for sharing your experience!
I would love to see an article on how often to replace the filters in a smart air purifier. I’m never quite sure when it’s time to get new ones.
Great question! For washing the filters, it’s best to use lukewarm water and a mild detergent. Avoid using soap or any harsh cleaning solutions as they may damage the filters. Rinse the filters thoroughly and allow them to fully dry before reinstalling.
Could you cover how to clean the sensors in a smart air purifier in a future article? I’m not sure if I need to clean them or how to go about it.